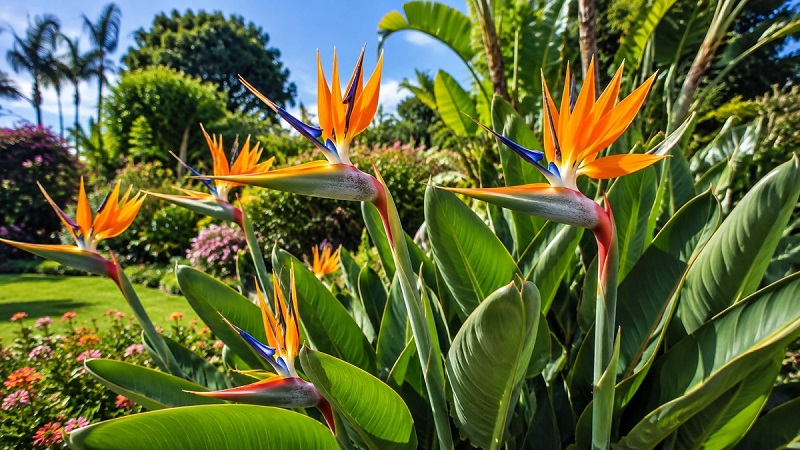
Growing & Caring for Bird of Paradise (Strelitzia)
Learn how to grow and care for Bird of Paradise (Strelitzia). Discover light, watering, soil, humidity, fertilizing, blooming, pruning, propagation, and pest control tips.
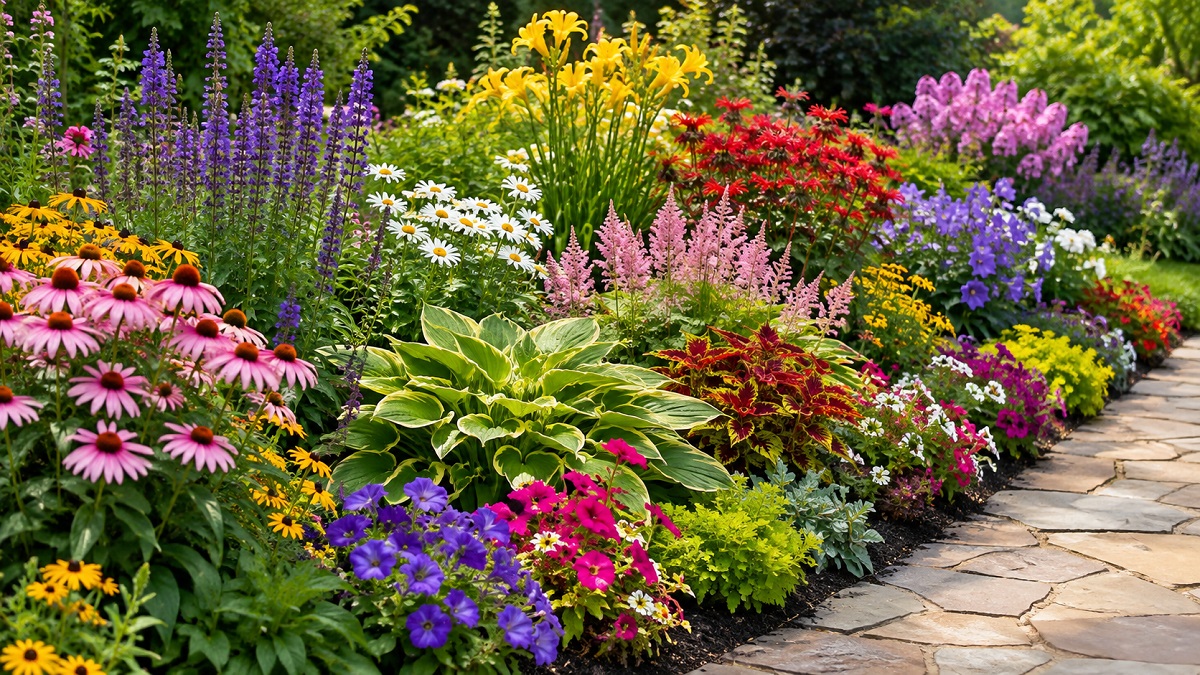
There is something profoundly satisfying about stepping out into a backyard transformed by well-designed flower beds. A flower bed is far more than a simple patch of dirt filled with colorful blossoms; it is a living canvas that reflects the season's rhythms, provides sanctuary for local pollinators, and establishes the aesthetic anchor for your entire outdoor landscape. Whether you are aiming to transform an unruly stretch of lawn into a flowing English cottage border, establish sleek raised planter boxes for modern curb appeal, or create a low-maintenance native perennial sanctuary, the core horticultural fundamentals remain remarkably consistent.
Building an exceptional flower bed requires balancing aesthetic vision with biological reality. Plants are living organisms that rely on healthy soil biology, proper moisture, precise sunlight exposure, and adequate space to flourish. When you take the time to understand your garden site—its native soil structure, microclimates, and light patterns—you transition from constantly fighting against nature to partnering with it. In this comprehensive manual, we will walk step-by-step through every phase of establishing, designing, planting, and maintaining flower beds that don't just survive, but thrive year after year.
The single most common mistake made by enthusiastic beginner gardeners is investing heavily in exotic nursery stock while completely neglecting the soil in which those plants must survive. The truth of horticulture is simple: you grow soil, and the soil grows the flowers. Soil is not merely an inert anchor for roots; it is a complex, living ecosystem packed with bacteria, beneficial fungi, earthworms, and essential minerals.
Before driving a single shovel into the turf, it is vital to assess your baseline soil texture. Soil generally falls into three main categories, each presenting distinct physical characteristics:
Regardless of what native soil type you start with, the universal cure is top-quality organic compost. Incorporating a 3-to-4-inch layer of rich compost into the top 8 to 12 inches of your bed improves drainage in heavy clay, enhances moisture retention in coarse sand, and supplies a gentle, slow-release buffet of macro and micronutrients. Furthermore, test your soil's pH level using an inexpensive home test kit. Most flowering perennials and annuals thrive in a pH range between 6.0 and 7.0. If your soil is excessively acidic, garden lime can raise the pH; if it is too alkaline, elemental sulfur or aluminum sulfate can help lower it to optimal levels.
Designing a flower bed is an exercise in visual rhythm, texture contrast, and spatial balance. Without a deliberate structure, a bed can easily look chaotic or cluttered rather than harmonious. Professional landscape designers rely on a set of time-tested design rules to transform random collections of nursery plants into stunning display beds.
The Rule of Layering (Foreground, Middleground, Background): Think of your flower bed as an amphitheater. Taller plants should occupy the back row (or the center if the bed is viewed from all sides), medium-height plants form the middle body, and low-growing or trailing species line the front border.
Understanding Color Theory in the Garden: Color choices evoke distinct moods. Monochromatic schemes (using varying shades of pink, purple, and white) yield a serene, sophisticated feeling typical of classic cottage gardens. Complementary color pairings—placing items opposite each other on the color wheel, such as purple Salvia alongside yellow Black-Eyed Susans—create energetic, high-contrast visual excitement that pops from a distance. Warm tones (reds, oranges, hot yellows) pull the eye forward and make large spaces feel intimate, while cool tones (blues, subtle violets, soft whites) recede visually, making small urban yards feel spacious and expansive.
One of the initial decisions every gardener faces when planning a new flower bed is whether to build directly into the existing earth or construct elevated raised beds. Neither method is universally superior; rather, the optimal choice depends entirely on your site conditions, physical capabilities, aesthetic preferences, and budget constraints.
| Feature / Aspect | In-Ground Flower Beds | Raised Bed Planters |
|---|---|---|
| Initial Setup Cost | Low to Moderate (Tools, compost, edging material) | Moderate to High (Lumber, stone, bulk soil mix) |
| Soil Control | Relies on native soil heavily amended over time | 100% control over imported soil blend from day one |
| Drainage Capacity | Dependent on existing subsoil permeability | Superior drainage; soil warms quickly in early spring |
| Ergonomics & Access | Requires bending, kneeling, and ground-level labor | Reduced strain on back and knees; easier accessibility |
| Pest & Weed Control | Vulnerable to creeping turf grasses and burrowing pests | Physical barrier deters gophers, voles, and weed roots |
| Water Retention | Higher moisture retention during summer heatwaves | Dries out faster; requires more frequent summer irrigation |
If you are working on a tight budget or managing an expansive plot of land, in-ground beds are exceptionally cost-effective and permit sweeping, organic curves that echo natural landscapes. However, if your property sits atop heavy compacted clay, contaminated urban soil, or ledge rock, constructing raised beds filled with a custom blend of topsoil, compost, and coarse sand bypasses local soil limitations entirely.
A truly exceptional flower bed never experiences an "off-season." The secret to achieving continuous, multi-season interest lies in carefully combining annuals, herbaceous perennials, bulbs, and evergreen structural plants. If you rely exclusively on summer-blooming perennials, your bed will look magnificent for six weeks in July and August, but spend the remaining ten months of the year looking bare and tired.
1. Annuals for Unbroken Summer Bloom: Annuals—such as Zinnias, Marigolds, Cosmos, Petunias, and Impatiens—complete their entire life cycle in a single growing season. Because their biological drive is to produce seeds quickly, they bloom continuously from late spring until the first autumn frost kill. Interspersing annuals among young perennials guarantees vibrant pops of color while slower-growing species establish their root systems over the years.
2. Perennials for Reliable Year-after-Year Returns: Many herbaceous perennials die back in winter and return in spring, while others remain evergreen or semi-evergreen depending on the species and climate. While individual perennial varieties typically bloom for a window of two to four weeks, layering early-season species (Creeping Phlox, Bleeding Heart) with mid-season bloomers (Coneflowers, Daylilies, Monarda) and late-season champions (Asters, Sedum 'Autumn Joy', Russian Sage) creates an uninterrupted relay race of color across the calendar.
3. Spring Bulbs for Early Warmth: Plant spring-flowering bulbs like Tulips, Daffodils, Crocuses, and Alliums during late autumn. As winter fades, these early risers punch through frozen ground to deliver cheerful early color before most perennials have even broken dormancy. As their foliage yellows and dies back naturally in early summer, rising perennial foliage emerges to conceal the decaying leaves seamlessly.
4. Evergreen Architecture for Winter Structure: Don't forget winter! Incorporating dwarf conifers such as Dwarf Alberta Spruce or Globe Arborvitae, along with evergreen or semi-evergreen plants such as Wintercreeper and suitable Heuchera cultivars, can help maintain winter structure.
Once you have planned your site, analyzed your soil, and chosen your plant material, it is time to turn theory into reality. Executing the physical installation properly saves hundreds of hours of weed-pulling and plant-replacing down the line.
Step 1: Outline the Bed Boundary
Lay out a flexible garden hose or heavy rope on your lawn to mark out the desired perimeter of your new flower bed. Smooth, sweeping curves look far more natural and relaxed than sharp angles, and they are significantly easier to navigate around when mowing your lawn.
Step 2: Clear the Turf and Weeds
You can remove existing lawn grass using two main methods. The immediate approach involves using a sharp flat-head spade or sod cutter to slice beneath the grass roots and peel away the turf sod. The slower, no-till method (known as sheet mulching or lasagna gardening) involves smothering the lawn under overlapping layers of corrugated cardboard or thick newspaper, soaking it with water, and covering it with 4 to 6 inches of rich compost and wood mulch. Over 2 to 4 months, the grass breaks down naturally into organic humus without turning over the soil.
Step 3: Amend and Till the Soil
Spread a 3-to-4-inch blanket of high-quality compost, well-rotted leaf mold, or aged manure over the cleared area. Use a broadfork or spade to gently loosen and integrate the amendments into the top 8 to 10 inches of native soil. Avoid over-tilling with mechanical gas tillers, as excessive pulverization destroys fragile soil structure and awakens dormant weed seeds lying deep beneath the surface.
Step 4: Install Clean Landscape Edging
Without a physical barrier, aggressive turf grass like Bermuda or Kentucky Bluegrass will quickly invade your newly dug flower bed. Trench along the perimeter and install rigid metal, heavy-duty brick, stone pavers, or deep plastic edging flush with the surrounding turf level. This creates a clean aesthetic line and keeps lawn mower wheels running smoothly along the border.
Step 5: Position and Plant
Before digging a single hole, arrange your potted nursery plants directly on top of the prepared soil bed according to your design plan. Stand back, assess the spacing, view the arrangement from your patio or kitchen window, and adjust as needed. Once satisfied, dig holes twice as wide as each plant's root ball, but exactly the same depth. Gently tease apart bound roots, place the plant in the hole, backfill with amended soil, and press down firmly to eliminate air pockets.
A flower bed is a living, evolving ecosystem. While a well-constructed bed requires far less labor than a manicured turf lawn, consistent maintenance keeps plants healthy, productive, and vibrant.
The Magic of Organic Mulch: Applying a fresh 2-to-3-inch layer of shredded hardwood bark or leaf mulch over the bare soil between plants yields immediate, transformative benefits. Mulch acts as a protective blanket: it suppresses weed seed germination by blocking sunlight, locks in soil moisture during summer droughts, regulates root temperatures during temperature swings, and slowly decomposes to feed soil microbes. Always keep mulch pulled back an inch or two from plant crowns and stems to prevent fungal rot.
Smart Watering Practices: Deep, infrequent watering beats frequent shallow sprinkles every time. Light daily surface sprinklings encourage plants to grow weak, shallow root systems that scorch during heatwaves. Aim to deliver approximately 1 to 1.5 inches of water once or twice per week directly to the soil surface using drip irrigation, soaker hoses, or a gentle watering wand. Keeping foliage dry reduces fungal diseases like powdery mildew and black spot significantly.
Pruning, Deadheading, and Division: Regular deadheading—removing spent, faded flowers before they set seed—tricks plants into producing new rounds of gorgeous blooms all season long. In spring or mid-summer, cut back leggy perennials to promote bushier growth. Every 3 to 5 years, mature perennial clumps (such as Hostas, Irises, and Daylilies) will grow overcrowded at their centers. Dig up the entire root mass during early spring or autumn, split the clump into smaller sections using a sharp knife or spade, and replant them around your garden or share them with neighbors.
Continue exploring our gardening guides with more plant profiles, growing tips, and practical advice for creating a healthy, productive garden.