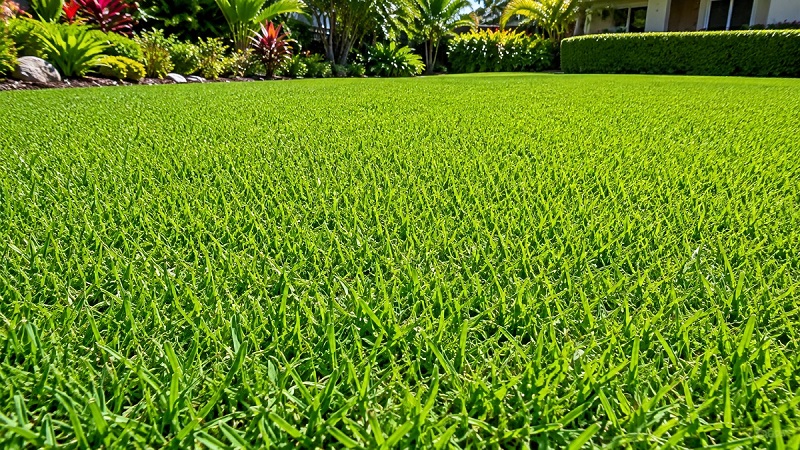
Growing & Caring for Bermuda Grass
Learn how to grow and care for Bermuda grass (Cynodon dactylon). Discover planting, watering, mowing, fertilizing, weed control, seasonal lawn care, and expert tips for a lush, healthy lawn.
Watering a garden manually with a hose or oscillating sprinkler can often feel like a full-time chore during hot summer months. Worse yet, conventional overhead watering methods lose up to half of their water volume to evaporation, wind drift, and runoff. If you have ever noticed weeds thriving in spaces between your crops while your prize tomatoes wilt under the summer heat, overhead watering is usually the culprit.
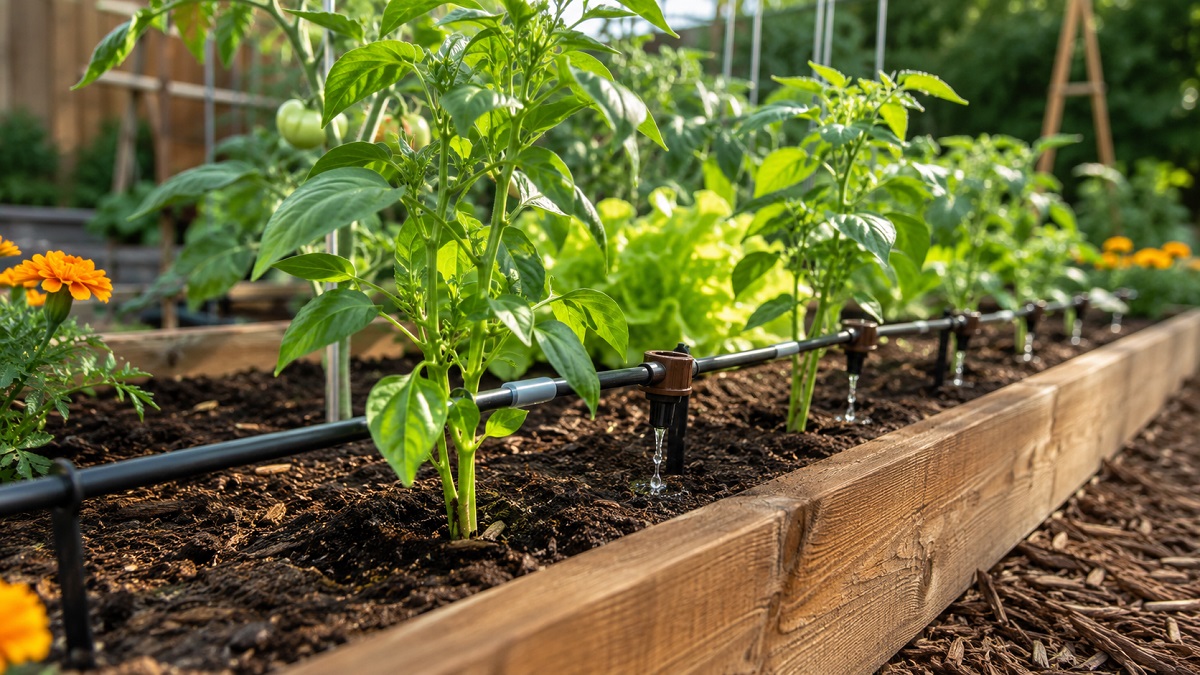
Enter drip irrigation: the standard for modern, efficient garden care. By applying water slowly, steadily, and directly to the soil root zone, drip systems deliver precisely what your landscape needs without wasting a single drop. Whether you are tending a small container deck, a series of raised vegetable beds, or an expansive ornamental orchard, installing a tailored drip system will transform how you garden. This comprehensive guide covers every aspect of designing, selecting, assembling, and maintaining an efficient micro-irrigation setup.
To understand why drip irrigation outperforms overhead sprinklers, we need to look at plant biology and water dynamics. When you spray water high into the air, much of it settles on plant leaves rather than reaching the soil. Foliage that stays wet for prolonged periods creates a prime breeding ground for fungal pathogens such as powdery mildew, black spot, and early blight. Furthermore, water spread across empty soil encourages weed seeds to germinate across your entire garden.
Drip irrigation operates through low-pressure, micro-delivery mechanisms. Water flows through a main network of tubing and drips slowly into the root zone via specialized point-source emitters or integrated drip tape. Because the flow rate is measured in gallons per hour (GPH) rather than gallons per minute (GPM), water penetrates deeply into the soil column without washing topsoil away or compacting delicate soil structures.
Building a reliable drip system requires matching the right parts in the correct order. Drip setups are modular, meaning you can build on simple hose-end kits or engineer custom multi-zone manifolds. Below is a breakdown of essential assembly components, starting from the water source down to individual emitters.
The head assembly sits right at your outdoor spigot or main valve header. It conditions incoming municipal or well water so it won't ruin delicate drip tubing or clog small emitters:
| Component Name | Primary Function | Recommended Specs | Maintenance Notes |
|---|---|---|---|
| Backflow Preventer | Prevents water cross-contamination | Hose thread brass or heavy ABS | Inspect annually for seals/leaks |
| Sediment Filter | Traps debris that clogs emitters | 120–150 Mesh Screen Filter | Unscrew & flush screen monthly |
| Pressure Regulator | Reduces high hose pressure | 20 PSI to 30 PSI Preset Output | Replace if downstream lines pop |
| Main Poly Line | Transports bulk water across garden | 1/2" or 3/4" UV-Resistant Polyethylene | Drain fully before winter freezing |
| Micro-Tubing | Branches water to individual plants | 1/4" Vinyl or Poly distribution tubing | Check for sun wear every 2 years |
| Point Emitters | Delivers calibrated water to plants | 0.5, 1.0, or 2.0 GPH Pressure-Compensating | Inspect regularly for salt crusting |
Once water passes through your head assembly, it travels through main distribution lines and outward to your plants:
1/2-inch Polyethylene Mainline: The primary arterial tubing for home garden systems. It bends around beds easily and serves as the trunk line that you tap into with 1/4-inch micro-tubing feeders.
1/4-inch Micro-Tubing: Smaller line used to extend 1 to 3 feet off the main 1/2-inch line directly into individual pots, hanging baskets, or spaced garden plants.
Pressure-Compensating (PC) Emitters: Premium emitters that supply an exact volume of water (e.g., 1 GPH) regardless of elevation changes or line distance. They are ideal for sloped terrain or long line runs.
In-Line Drip Line (Drip Tape or Emitter Tubing): Tubing manufactured with internal drip emitters built right into the line at set intervals (usually 6, 12, or 18 inches apart). Highly effective for vegetable crop rows and uniform raised beds.
Installing drip irrigation without a simple layout map often leads to uneven water pressure, kinked tubing, and poor plant growth. A little upfront design work makes assembly fast and keeps your system performing well over time.
Before buying supply lines and emitters, check how much water your spigot delivers. Run the standard Bucket Test:
(5 Gallons ÷ Seconds) × 3600 = Total Available GPH
If your spigot fills a 5-gallon bucket in 30 seconds, your system has 600 GPH of available flow. To maintain solid water pressure, your total connected drip emitters on a single active zone should not exceed 75% of that capacity (450 GPH max).
Avoid running the same drip line to thirsty leafy greens and drought-tolerant perennials. Group plants into distinct hydration zones according to their needs:
Putting together a drip irrigation system is surprisingly quick and straightforward. You won't need specialized plumbing skills—just a pair of pipe cutters, a hole punch tool, and a bucket of hot water to soften tubing ends.
Thread your backflow preventer onto the outdoor spigot. Attach your timer directly below it, followed by the screen filter and the pressure regulator. Finish by screwing on the hose-to-1/2-inch tubing adapter. Wrap all threaded connections with plumber's PTFE tape to guarantee watertight seals.
Unroll your 1/2-inch polyethylene supply line and lay it out in the sun for 30 minutes. Solar heat softens the coil memory, making the line pliable and much easier to lay straight along garden paths and raised bed perimeters. Secure main lines in place using heavy-duty galvanized metal ground stakes placed every 4 to 6 feet.
Use plastic tee fittings, elbow fittings, or 4-way cross connectors to split your 1/2-inch trunk up into raised garden boxes. Push compression fittings firmly onto clean tubing ends until they seat completely.
Use a punch tool to pierce cleanly into the 1/2-inch poly line. You will hear a distinct snap when inserting a 1/4-inch barb connector or point emitter directly into the punched hole. Run 1/4-inch micro-tubing from the barb output directly to individual plants, anchoring the line end with a tubing stake.
Crucial Step: Before capping off line ends with figures-of-eight plugs or threaded end caps, turn on your water supply full strength for 2 minutes. Flushing clears out dirt, plastic shavings, and soil particles trapped inside during installation. Once water flows clean from all open line ends, shut off the spigot, fold over the poly tubing ends, and lock them securely with figure-eight end clamps.
A great benefit of converting your garden to micro-irrigation is complete watering automation. Installing a modern smart timer lets you set precise watering schedules that adjust dynamically for rain, extreme heat, or cold weather.
Single-Dial Battery Timers: Simple and affordable, these battery units offer basic daily or every-other-day schedules. They work well for small plots, though you'll need to manually pause them when it rains.
Bluetooth Controllers: Let you configure schedules on your smartphone from your patio or home without opening the timer box. They offer clean digital setups, but lack remote access when you travel away from home.
WiFi-Enabled Smart Controllers: The top choice for modern gardens. Smart hubs connect to home network routers, automatically pulling local weather forecasts to delay watering runs during rainfall, frost, or high ambient humidity.
Early Morning (4:00 AM – 7:00 AM): The absolute best time slot to run drip zones. Cooler ambient temperatures minimize evaporative loss, and moisture soaks deep into the soil before sun heat peaks.
Avoid Night Watering: Water applied late in the evening lingers around roots and creates damp pockets overnight, inviting root rot and garden pests like snails and slugs.
Drip systems require minimal day-to-day effort, but carrying out seasonal checks keeps lines from clogging, cracking, or bursting under stress.
Water left inside poly tubing expands when frozen, cracking plastic fittings, rupturing backflow valves, and splitting pressure regulators. Follow these winterization steps before the first hard freeze:
Even well-designed drip setups encounter occasional maintenance issues over time. Here is how to quickly identify and fix common problems:
| Symptom | Probable Cause | Corrective Action |
|---|---|---|
| Fittings popping off tubing | Missing pressure regulator or excessive line pressure | Install a 25 PSI pressure regulator after the hose spigot filter. |
| Low flow at distant line ends | Exceeded total line GPH capacity or tubing runs too long | Split system layout into separate zones or upgrade trunk line to 3/4-inch poly. |
| Emitters sputtering / stopped dripping | Sediment buildup or mineral scale inside micro-orifices | Soak clogged emitters in household vinegar to dissolve mineral crust. Flush lines thoroughly. |
| Water pooling near hose connection | Worn hose washers or missing PTFE plumber's tape | Replace rubber hose washers inside female swivel connectors and rewrap threads with PTFE tape. |
Continue exploring our gardening guides with more plant profiles, growing tips, and practical advice for creating a healthy, productive garden.