Growing & Caring for Bidens (Beggarticks)
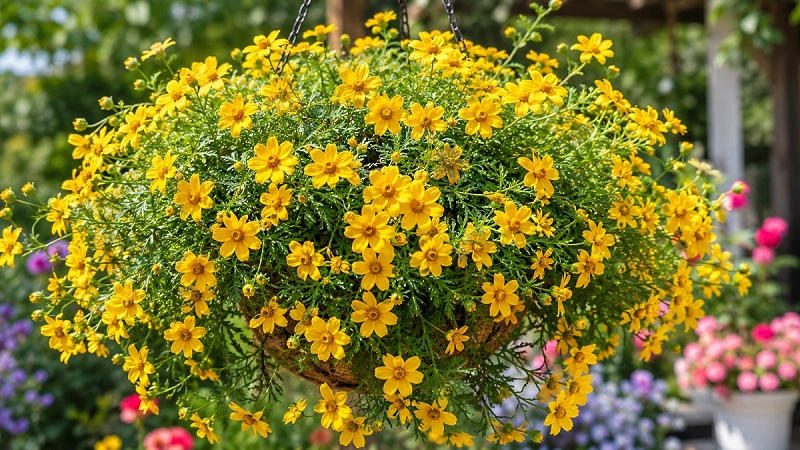
Learn how to grow and care for Bidens (Beggarticks). Discover planting, sunlight, watering, fertilizing, pruning, propagation, pest control, and tips for abundant blooms.
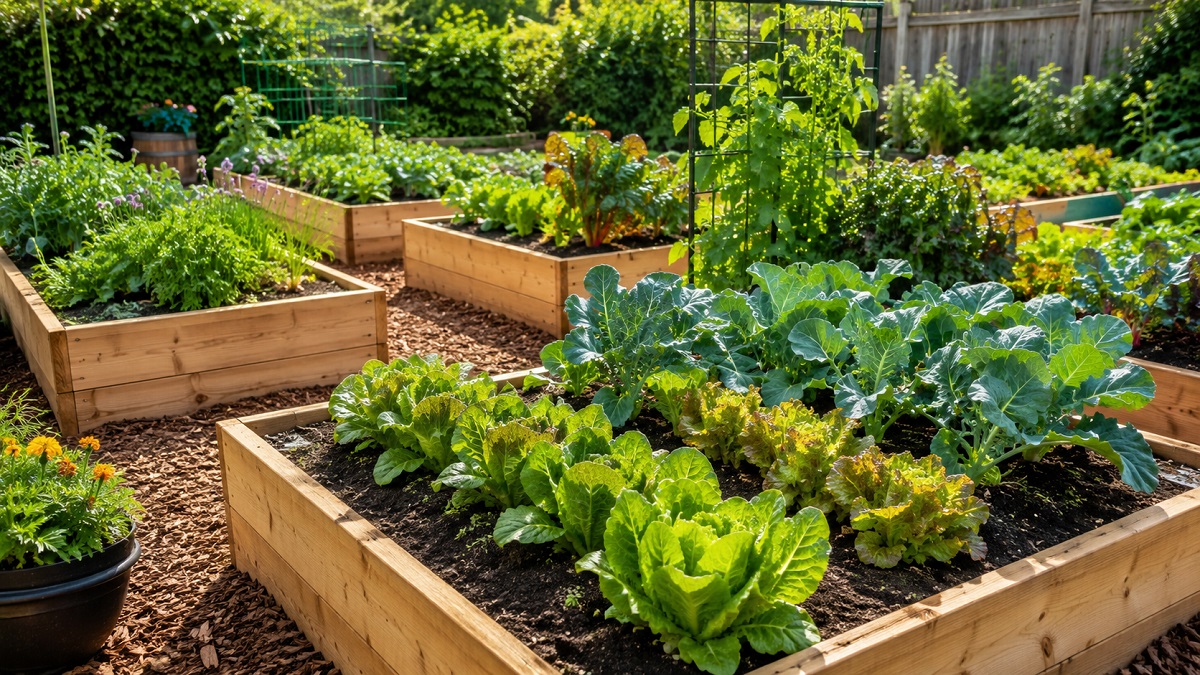
There is a subtle, profound joy that comes with walking out to a raised bed garden early in the morning. Your shoes stay dry on the woodchip pathway while your plants thrive in soft, weed-free, nutrient-rich soil elevated to a comfortable working height. Raised bed gardening isn't just a trend—it's a transformative approach to food production that solves poor drainage, heavy clay, rocky ground, and back strain in a single move.
Essential parameters to double-check before building or planting your next box (Bookmark this overview).
Traditional row gardening has served humanity for millennia, but for the home grower managing limited yard space, urban soils, or dense native clay, in-ground planting can feel like a constant uphill battle. When you build a raised bed, you step out of the ecosystem of native soil limitations and create an optimized environment from day one.
The primary advantage lies in soil structure control. In standard gardens, foot traffic continuously packs down the earth surrounding your vegetables. Heavy machinery, pets, and human steps compress the delicate pore space necessary for plant roots to access oxygen and exchange gases. In contrast, a well-designed raised bed is never stepped on. The soil remains fluffy, friable, and loose, allowing roots to penetrate quickly, expand horizontally, and anchor deeply without expending unnecessary metabolic energy.
Additionally, raised beds warm up significantly faster in the spring. Because the soil sits above the ambient ground level and its sides are exposed to sun-warmed air, drainage occurs more rapidly after spring rains, and soil temperatures rise weeks ahead of in-ground plots. This grants growers in northern or temperate climates a head start on spring brassicas, radishes, and spinach, while ensuring heat-loving crops like tomatoes and peppers take off rapidly come early summer.
The material you choose for your bed frames shapes not only your garden's aesthetic but also its longevity, thermal dynamics, and overall cost. No single material is perfect for every home; each presents unique trade-offs between up-front investment and long-term durability.
| Material Type | Expected Lifespan | Pros | Cons |
|---|---|---|---|
| Cedar / Redwood | 10 - 15 Years | Naturally rot-resistant, beautiful natural look, non-toxic, lightweight to assemble. | Higher upfront lumber cost; will eventually weather to gray and decay. |
| Galvanized Steel / Aluzinc | 20 - 30+ Years | Extremely durable, sleek modern appearance, impervious to insects and fungi. | Heavier initial shipping; can absorb sun heat on surface (though soil usually stays cool). |
| Composite / Plastic Lumber | 20 - 25 Years | Will not rot or splinter, often made from recycled content, low maintenance. | Slight flex over long spans without reinforcement; higher initial cost; synthetic look. |
| Untreated Pine / Spruce | 3 - 5 Years | Very affordable, widely available, non-toxic, ideal for temporary trials. | Quickly decomposes in humid or wet conditions; requires replacement within years. |
| Masonry / Stone / Brick | 50+ Years | Permanent structure, incredible thermal mass, rustic old-world feel. | Labor-intensive construction, permanent placement, can raise soil pH over time. |
When choosing wood, always opt for natural rot resistance over chemical preservation. Modern pressure-treated wood uses copper-based compounds rather than arsenic, but many organic gardeners still prefer naturally durable species like Western Red Cedar, Redwood, or Black Locust. If you choose untreated softwoods like Douglas Fir or Pine to save money, budget to replace the structural walls within four to five seasons.
One of the most common mistakes new gardeners make is creating beds that are too wide. The golden rule of raised bed ergonomics is simple: never build a bed wider than four feet if accessible from both sides, or two feet if built against a wall or fence.
Four feet allows the average adult to reach comfortably into the middle of the bed without stepping onto the soil. Stepping into your bed defeats its main purpose by compacting the carefully curated soil structure you built.
Your raised bed is only as good as the medium inside it. Filling a raised bed with plain topsoil stripped from your lawn is a recipe for frustration; field soil quickly turns into a hard brick when placed inside an elevated structure without natural subsoil earthworm aeration.
Instead, custom-blend a light, well-draining, highly organic substrate. A classic starter framework is the variation of the classic "Mel's Mix," adapted for long-term organic mineral balance:
| Component | Proportion | Purpose & Function |
|---|---|---|
| Blended Quality Compost | 40% - 50% | Provides biological life, micro/macronutrients, and organic moisture retention. Combine 3+ sources (e.g., worm castings, mushroom compost, aged cow manure). |
| Peat Moss or Coir | 30% - 40% | Creates structure, holds water efficiently, and prevents light soil components from washing away during heavy downpours. |
| Perlite or Coarse Vermiculite | 10% - 20% | Prevents compaction, creates aeration pockets, and allows fast root movement through the bed profile. |
| Organic Amendments | Handfuls per yard | Add biochar, kelp meal, rock dust (for trace minerals), and aged bone meal to feed soil microbes over multiple seasons. |
Always mix your ingredients thoroughly in a wheelbarrow or on a tarp before shoveling them into the bed. Water each layer deeply as you fill it; this helps the light particles settle naturally without forming air pockets that sink later after your first big rain.
If you are filling extra-deep raised beds—such as modern 24-inch or 32-inch metal corrugated planter boxes—buying hundreds of gallons of premium soil mix can quickly become expensive. This is where the ancient technique of Hügelkultur (German for "hill culture") comes into play.
Instead of filling the entire bed with costly soil, layer organic biomass in the bottom half of the structure to create a slow-release sponge that decays over years into fertile humic material:
Layer 1 (Bottom 30-40%): Lay down thick, rotting logs, thick tree branches, and hardwood debris. Oak, maple, birch, and fruitwoods work wonderfully. Avoid black walnut (which contains juglone, a natural herbicide) and cedar (which takes decades to decompose).
Layer 2 (Middle 20%): Layer smaller twigs, fallen leaves, straw, lawn clippings, and overturned green sod. Water this layer thoroughly to initiate decomposition and fill air gaps between logs.
Layer 3 (Top 40-50%): Fill the top 12 to 18 inches with your premium custom soil blend. This is where your plants' feeder roots will live during their first season while the lower woody material begins to break down.
As the wood beneath breaks down, it acts as a reservoir, holding onto winter and spring rainfall like a subterranean sponge. During hot summer months, deep-rooted crops like tomatoes will drop roots down into this cool, damp wood layer, drastically reducing your need to water manually.
Because raised beds offer such ideal growing conditions, you can plant far more densely than in traditional garden rows. Two popular high-density strategies are Square Foot Gardening and Companion Guild Planting.
Square Foot Gardening divides the bed surface into a grid of 1x1 foot squares. Depending on the size of the mature plant, you seed or transplant a specific number of items per square:
| Grid Density | Target Plants | Spacing Notes |
|---|---|---|
| 1 per square | Large Solanaceae & Brassicas | Tomatoes, peppers, eggplants, broccoli, cabbage, cauliflower. Center the plant in the middle of the grid block. |
| 4 per square | Medium Vegetables | Leaf lettuce, spinach, Swiss chard, bush beans. Space evenly in a 2x2 layout inside the square. |
| 9 per square | Small Root Crops | Beets, bush onions, spinach, large garlic bulbs. Space in a 3x3 layout. |
| 16 per square | Tiny Root Crops & Greens | Radishes, carrots, baby onions. Space in a 4x4 grid pattern for maximum yield per square foot. |
Combine this intensive grid layout with smart companion planting. Pair heavy feeders like tomatoes with French marigolds (which deter root-knot nematodes with natural chemical exudates) and basil (which repels pests while thriving in similar sun and soil moisture conditions). Interplant quick-growing radishes alongside slow-germinating carrots; by the time the carrots need space to expand, the radishes have already been harvested!
While raised beds drain exceptionally well—a major benefit during heavy rains—they also dry out faster than in-ground garden plots during mid-summer heatwaves. Efficient watering systems and moisture management are key to keeping your plants hydrated without washing away valuable nutrients.
Drip Irrigation & Soaker Hoses: Overhead hand-watering with a hose nozzle is inefficient and often leads to fungal issues like powdery mildew on leaf surfaces. Installing simple drip line grids or snake-patterned soaker hoses connected to an automatic timer ensures water delivers straight to the root zones at dawn, reducing evaporation losses by up to 70%.
The Power of Organic Mulch: Never leave raised bed soil exposed to bare sun. Apply a 2-to-3-inch layer of clean wheat straw, shredded clean leaves, or seed-free wood shavings across the top of your soil. Mulch regulates soil temperature, suppresses weeds, prevents crusting, and provides habitat for beneficial surface-dwelling soil organisms.
Maintaining a raised bed requires far less physical labor than managing traditional garden rows, but taking care of your soil between seasons ensures top yields year after year.
Mid-Season Top-Dressing: As crops grow and soil microbes break down organic matter, soil levels naturally drop by an inch or two each season. After clearing out summer crops in late summer or fall, top-dress your beds with 2 inches of freshly finished compost. There is no need to till or turn the soil—simply lay the compost on top, and rain, frost cycles, and earthworms will carry those nutrients down into the root zone.
Winter Cover Crops: If leaving beds empty over winter, plant a green manure cover crop like Winter Rye, Crimson Clover, or Field Peas in early fall. Cover crops prevent soil erosion during winter storms, fix atmospheric nitrogen into the soil, and build active root systems that feed beneficial biology straight through the cold months. Terminate the cover crop in early spring 3-4 weeks before planting your spring crops.
Continue exploring our gardening guides with more plant profiles, growing tips, and practical advice for creating a healthy, productive garden.