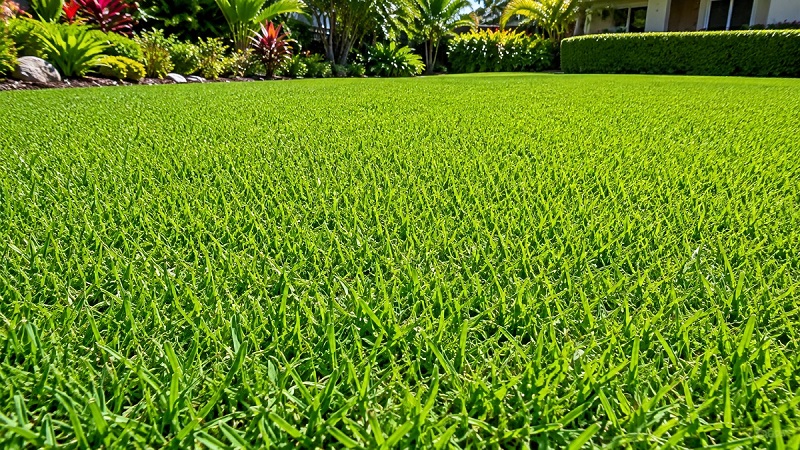
Growing & Caring for Bermuda Grass (Cynodon dactylon)
Learn how to grow and care for Bermuda grass (Cynodon dactylon). Discover planting, watering, mowing, fertilizing, weed control, seasonal lawn care, and expert tips for a lush, healthy lawn.
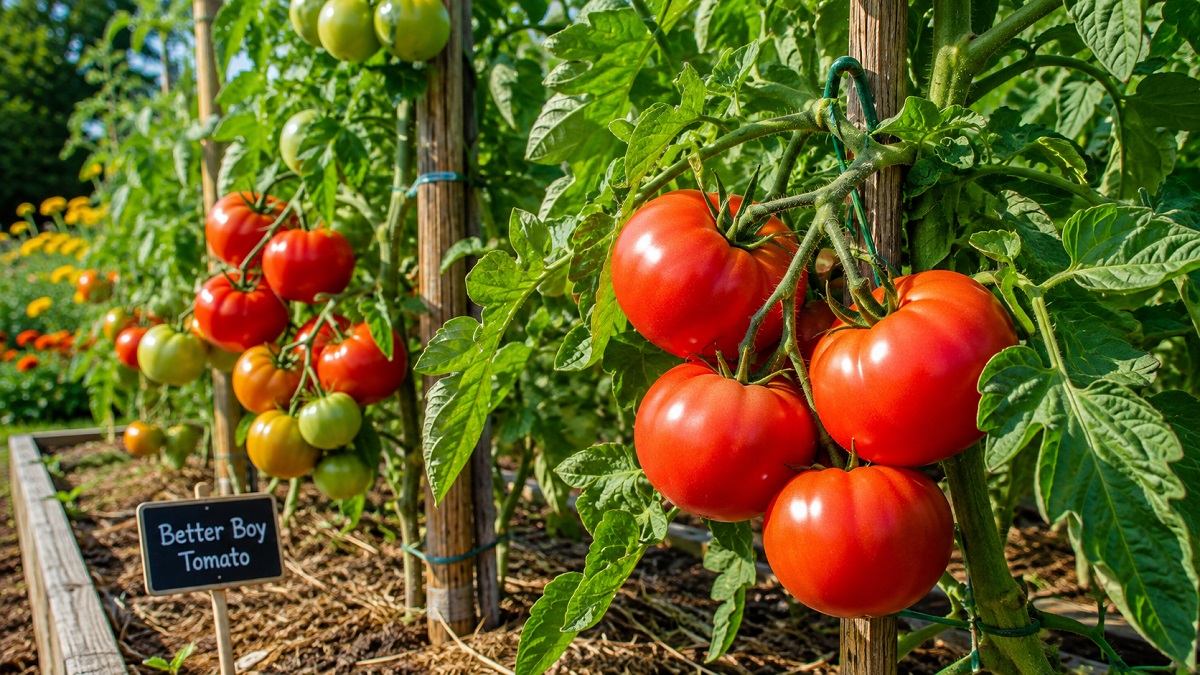
If there were a hall of fame for backyard garden vegetables, the Better Boy tomato (Solanum lycopersicum 'Better Boy') would sit proudly on the top shelf. Introduced to home gardeners decades ago, this classic hybrid has earned its permanent spot in suburban plots, raised beds, and homestead gardens across North America. Why? Because it hits that rare, sweet spot every gardener craves: towering yields, superb disease resistance, and that rich, balanced, old-fashioned tomato flavor that instantly ruins store-bought produce for anyone who takes a bite.
Whether you are a beginner looking for a reliable first crop or a seasoned grower seeking to maximize your yield per square foot, learning how to properly plant, feed, prune, and protect your Better Boy plants will yield dividends all summer long. In this comprehensive guide, we will break down every single aspect of cultivating Better Boy tomatoes—from seed starting and soil chemistry to complex trellis systems, watering schedules, pest defense, and harvesting tricks.
Keep these core parameters in mind when planning your plot: high sun, deep water, and sturdy support are the three pillars of success.
To grow a plant exceptionally well, you must first understand how it operates. Better Boy tomatoes are an indeterminate hybrid variety. The term indeterminate means that unlike bush tomatoes (determinate) which grow to a set size, produce all their fruit at once, and die back, the Better Boy keeps growing, blooming, and producing fruit continuously until the first hard frost of autumn kills the vine.
In ideal conditions, a single plant can easily reach 6 to 9 feet tall and spread several feet wide. It is a direct descendant of the famous Big Boy tomato, bred specifically to improve disease resistance while preserving the meaty texture and smooth, bright red skin that slicing tomatoes are famous for.
One of the greatest advantages of the Better Boy is its Guinness World Record heritage for fruit production. A single plant can yield dozens of massive, pound-sized fruits throughout the summer season. The flesh is dense, with a fantastic balance of sugars and acids, making it perfect for sandwiches, fresh caprese salads, home canning, and fresh salsa.
Great tomatoes aren't grown in the leaves; they are grown in the soil. Better Boys are heavy feeders with deep, extensive root systems that dislike compacted, poorly drained earth. Taking the time to properly condition your soil weeks before planting will drastically reduce your maintenance workload during the hot summer months.
First, choose a location that receives absolute full sun. In gardening terminology, full sun means an unobstructed minimum of 6 hours of direct sunlight daily, though 8 to 10 hours is ideal. Sun exposure powers the photosynthetic process required to generate sugars, which directly translates to sweeter, more flavorful tomatoes.
Better Boys thrive best in warm, well-draining, loamy soil rich in organic matter. They prefer a soil pH range between 6.0 and 6.8. Soil that is too acidic (below 5.5) or too alkaline (above 7.5) locks up essential soil micronutrients like phosphorus, calcium, and magnesium, making them unavailable to the plant regardless of how much fertilizer you apply.
Work 3 to 4 inches of aged compost, well-rotted manure, or leaf mold into the top 10 to 12 inches of your garden bed. This organic matter improves aeration in heavy clay soils while boosting moisture retention in sandy soils. If a soil test indicates a low pH, apply garden lime according to package directions; if the pH is too high, elemental sulfur can help dial it back down.
Gardening enthusiasts often debate whether it is better to raise Better Boy tomatoes from seed indoors or simply buy nursery transplants in the spring. Both avenues have their merits depending on your budget, time constraints, and indoor setup.
Starting from Seed: If you start from seed, begin indoors roughly 6 to 8 weeks before your region's average last spring frost date. Use clean seed-starting trays filled with a sterile, lightweight soil-less potting mix. Sow seeds 1/4 inch deep and keep them moist at a temperature of 75°F to 80°F using a seedling heat mat. Once germinated, provide 14 to 16 hours of strong light daily using LED or fluorescent grow lights placed just a few inches above the canopy.
Buying Nursery Transplants: If you prefer to skip the indoor nursery phase, purchase stocky transplants from a local garden center. Look for plants that are 6 to 10 inches tall with thick stems, deep green foliage, and zero signs of yellowing leaves, spots, or early blossom buds. Avoid "leggy" or root-bound plants that have been sitting in small plastic six-packs for too long.
Tomatoes possess an extraordinary biological property that sets them apart from most other garden vegetables: tiny hair-like bumps called adventitious roots along their stems. If buried underground, every single one of those tiny bumps will transform into a full-fledged root branch! Deep planting creates an exceptionally sturdy foundation able to draw moisture from deep within the earth during dry spells.
| Step | Action Required | Gardener's Purpose |
|---|---|---|
| 1. Hardening Off | Expose seedlings outdoors gradually over 7–10 days prior to planting. | Prevents sun scald, wind damage, and transplant shock. |
| 2. Lower Pruning | Snip off all lower leaves, leaving only the top 3–4 sets of leaf clusters. | Prepares the main stem to be safely buried under soil. |
| 3. Trench or Deep Hole | Dig a hole or horizontal trench 8–12 inches deep. | Accommodates burying up to 70% of the plant stem. |
| 4. Hole Amending | Add compost, bone meal, and slow-release organic fertilizer to the hole bottom. | Places essential nutrients right where emerging roots can reach them. |
| 5. Plant & Backfill | Place plant in hole, press soil firmly, and water deeply with liquid kelp solution. | Eliminates air pockets around roots and stimulates fast root growth. |
| 6. Mulch Layer | Apply a 2-3 inch layer of clean straw, pine needles, or shredded leaves. | Suppresses weeds, retains soil moisture, and prevents fungal splash-back. |
If there is one area where tomato growers struggle most, it is irrigation. Better Boy tomatoes require consistent, predictable soil moisture. Irregular watering causes severe physiological problems that can destroy an otherwise beautiful harvest.
When soil dries out completely and is then suddenly drenched with water, the rapidly expanding internal fruit tissue splits the outer skin open. Furthermore, inconsistent watering prevents roots from absorbing calcium, leading to blossom end rot.
1. Water the Base, Not the Canopy: Always apply water directly to the soil root zone using a drip irrigation line, soaker hose, or watering wand. Wet foliage encourages fungal spores like early blight, Septoria leaf spot, and powdery mildew to germinate and destroy your canopy.
2. Deep, Infrequent Soakings: Shallow, light daily waterings encourage weak, surface-level roots. Instead, soak the root zone thoroughly 2 to 3 times per week, providing approximately 1 to 2 inches of total water per week (more during extreme heat waves over 90°F / 32°C).
3. The Mulch Imperative: Never leave bare dirt exposed around your tomato plants. A generous layer of organic mulch moderates soil temperatures, stops moisture evaporation, and creates a barrier that prevents soil-borne fungal spores from splashing onto lower leaves during heavy rains.
Because Better Boys are vigorous indeterminate growers, they need steady nutrition throughout their long lifecycle. However, dumping high-nitrogen fertilizer onto your tomatoes continuously is one of the biggest mistakes you can make! Excess nitrogen produces massive, jungle-like green bushes with thick stems—but almost zero flowers and zero fruit.
| Growth Stage | Ideal N-P-K Ratio | Primary Focus | Application Frequency |
|---|---|---|---|
| Early Growth (Weeks 1-4) | Balanced (e.g., 10-10-10 or 5-5-5) | Establishing stem height, leaf canopy, and strong roots. | Every 14 days at half-strength. |
| Flowering & Fruit Set | Low-N, High-P (e.g., 5-10-10 or 3-4-6) | Stimulating abundant blossom clusters and firm fruit set. | Every 10 to 14 days. |
| Harvest & Ripening | Moderate-P, High-K (e.g., 4-6-10) | Potassium powers fruit size, color, sugar production, and flavor. | Every 7 to 10 days throughout peak summer. |
Do not underestimate the size and sheer weight of a healthy Better Boy tomato plant laden with dozens of 1-pound slicing tomatoes. A single mature vine can easily weigh 30 to 50 pounds! Without sturdy structural support, your plants will sprawl across the muddy ground, opening the fruit to rot, slugs, rodents, and fungal diseases.
Set up your support structure on the very day you plant your tomatoes. Driving stakes or pressing heavy cages into the ground later in the season will sever vital root structures beneath the soil.
1. Heavy-Duty Tomato Cages: Skip the flimsy 3-ring wire cages sold at hardware stores; a Better Boy will crush them by July. Build or buy heavy square folding cages made from welded rebar or concrete remesh wire (5 feet tall minimum).
2. Single Wood / T-Post Staking: Drive a 6-to-8-foot wooden stake or steel T-post 18 inches into the ground right next to the plant. As the main stem grows upward, tie it loosely to the stake every 8 inches using soft garden twine, cloth strips, or specialized plant clips.
3. The Florida Weave: Ideal for gardeners growing a long row of tomatoes. Drive heavy T-posts every two to three plants along the line. Weave weather-resistant twine back and forth tightly between the posts, sandwiching the growing tomato stems between double lines of string at 8-inch vertical intervals.
Pruning causes more anxiety among tomato growers than almost any other task. Because Better Boys are indeterminate vines, they constantly produce small auxiliary shoots known as suckers in the "crotch" junction where a horizontal leaf branch meets the vertical main stem.
If left completely unpruned, every sucker will grow into a massive branch of its own, creating a dense, tangled, impenetrable bush. While this results in more total tomatoes, the fruit will generally be smaller, harvest times will be delayed, and restricted airflow dramatically increases the risk of fungal disease.
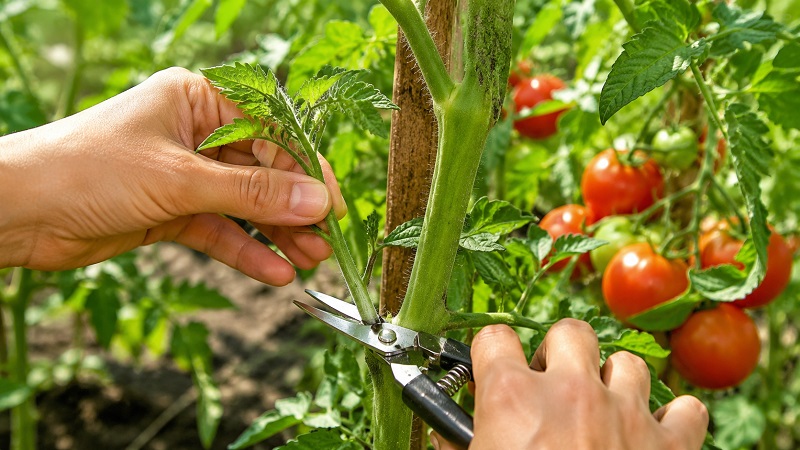
• Single or Double Stem Training: Choose one main stem (or the main stem plus the strong sucker right below the first flower cluster) and pinch out all other small suckers when they are 1 to 2 inches long using clean fingers or sharp shears.
• Bottom Pruning (Airflow Clearance): As the plant reaches 4 feet in height, prune off all branches within 12 to 18 inches of the soil level. Removing lower leaves prevents dirt from splashing onto foliage and improves air circulation around the base of the plant.
• End-of-Season "Topping": About 4 to 6 weeks before your average first fall frost date, cut off the top growing tips of your main vines. This halts new vegetative growth and forces the vine to dump all its remaining photosynthesized sugars into ripening the existing green tomatoes before winter arrives.
The Better Boy hybrid was specifically bred for outstanding disease resistance. You will often see the letters VFN listed on the plant tag or seed packet:
• V = Verticillium Wilt: A soil-borne fungus causing leaf yellowing and stem vascular browning.
• F = Fusarium Wilt: A devastating fungal pathogen that causes rapid wilting and plant death.
• N = Nematodes: Microscopic root-knot roundworms that attack roots and restrict water intake.
Despite these built-in defenses, no plant is completely immune to environmental pressures or insect pests. Here is how to identify and address the most common obstacles:
| Issue / Pest | Visual Symptoms | Organic Prevention & Remedy |
|---|---|---|
| Tomato Hornworm | Massive green caterpillar with a tail horn; strips foliage and bites large chunks out of green fruit overnight. | Hand-pick immediately and drop in soapy water. Spray with organic Bt (Bacillus thuringiensis) if infestations are severe. |
| Early Blight | Concentric "bullseye" brown spots on lower foliage, progressing upward until leaves turn yellow and drop off. | Prune bottom leaves, apply copper fungicide preemptively before wet weather, and never overhead water. |
| Aphids & Whiteflies | Tiny green or white insects clustered under leaves; sticky honeydew residue on foliage. | Blast off stems with a sharp jet of hose water, or spray with organic insecticidal soap / neem oil solution. |
| Blossom Drop | Yellowing blossom stems causing flowers to fall off without setting fruit. | Caused by temperature extremes (day temps over 90°F/32°C or night temps under 55°F/13°C). Use shade cloth during heatwaves. |
| Catfacing | Deformed, scarred, puckered bottoms on early spring fruit. | Caused by incomplete pollination during unusually cool spring blooms. Cosmetic only; edible once trimmed. |
After roughly 70 to 75 days post-transplant, your diligence will pay off in full. Your Better Boy tomatoes will transition from deep glossy green to pale yellow-orange, and finally to a gorgeous, deep crimson red.
Harvest your tomatoes when they are fully colored, smooth, and yield slightly to gentle thumb pressure. To harvest, grasp the fruit gently and snap the stem right at the natural joint ("breaker point") located just above the green cap (calyx), or snip it clean with hand pruners.
If you have problems with birds, squirrels, or hornworms stealing your prize tomatoes right as they turn red, use the breaker stage technique! As soon as a green tomato shows its first blush of pink color at the blossom end (around 20-30% colored), it has reached what botanists call the physiological "breaker stage."
At this point, an abscission layer forms across the stem, sealing off any further nutrient transfer from the main vine. You can pick the tomato immediately and bring it indoors to finish ripening on your kitchen counter out of direct sunlight. The indoor-ripened tomato will achieve the exact same flavor, texture, sugar content, and vivid color as if it had ripened outdoors on the vine—completely safe from hungry garden pests!
NEVER place fresh, ripe tomatoes inside a refrigerator! Cold temperatures (below 50°F / 10°C) break down aromatic volatile compounds responsible for that incredible homegrown flavor while degrading cell walls, turning crisp, juicy flesh into a mealy, tasteless sludge. Store harvested tomatoes stem-side down at room temperature on your counter and consume them within 3 to 7 days.
Continue exploring our gardening guides with more plant profiles, growing tips, and practical advice for creating a healthy, productive garden.