Growing & Caring for Begonias (Begonia spp.)
Learn how to grow and care for begonias with expert tips on light, watering, soil, fertilizing, propagation, overwintering, and solving common plant problems.
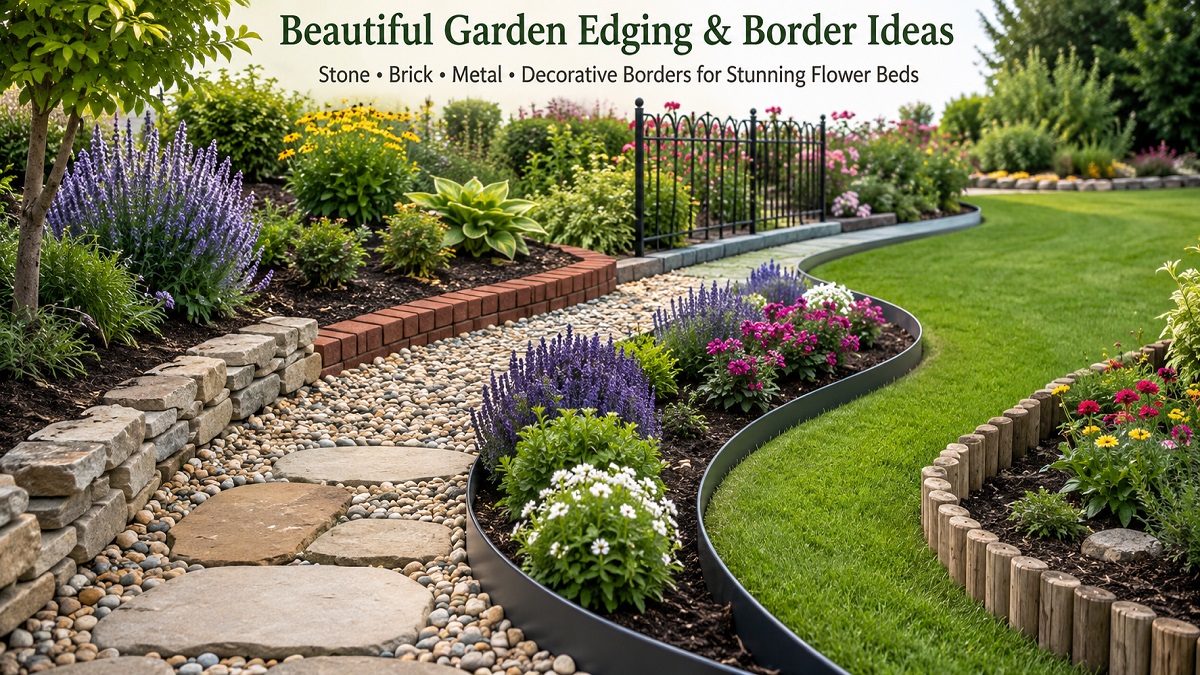
If you have ever spent a Saturday afternoon fighting back creeping bermudagrass or trying to sweep stray pine straw back into your flower beds, you already know the single biggest secret of stunning landscapes: crisp, clean borders. Garden edging is the unsung hero of outdoor design. It acts like a sharp picture frame around an oil painting, instantly elevating a wild, untamed yard into a clean, intentional sanctuary.
Beyond making your yard look like a professional landscape architect spent a week tuning every angle, border edges solve structural challenges in your garden. Without a defined barrier, soil erodes during heavy rain, mulch washes onto the grass, and invasive lawn turf spreads aggressively into your delicate perennial beds.
Good garden edging creates a functional boundary that holds soil moisture where plants need it, keeps lawnmower blades away from tender plant stems, and saves hours of tedious manual weed-whacking every time you mow.
Selecting the perfect edging material comes down to balancing your personal architectural style, your physical stamina for DIY installation, and your target budget. Let's look at the most popular materials landscape experts use today.
Nothing beats the timeless weight and character of natural stone. Whether you choose smooth river boulders, stacked flagstone, or formal granite cobblestones, natural stone blends seamlessly into almost any landscape setting. Stone handles frost heaves exceptionally well and lasts indefinitely.
For formal garden designs, historic homes, or cottage-style flower beds, clay brick edging provides warm tones and clean geometry. Laying bricks in a classic Victorian sawtooth pattern (angled diagonally) adds charming visual texture while helping channel rainwater runoff.
If you prefer clean lines, sleek modern architecture, or sharp geometric bed curves, commercial-grade steel strip edging is an ideal choice. Corten steel develops a protective, warm rust patina over time that looks incredible when paired with lush green foliage or dark pine bark.
Landscape timbers, cedar beams, and pressure-treated wood bring natural warmth to garden beds. They are particularly useful when building straight, raised vegetable garden beds or terraced hill slopes. Opt for naturally rot-resistant woods like cedar or redwood whenever possible.
Use this side-by-side comparison matrix to determine which border material fits your project goals and budget range best:
| Edging Material | Estimated Cost | Lifespan | DIY Difficulty | Best Architectural Match |
|---|---|---|---|---|
| Natural Stone | $$$ (High) | 50+ Years | Moderate to Heavy | Rustic, Native, & Craftsman |
| Brick Pavers | $$ (Moderate) | 25–50 Years | Moderate | Cottage, Formal, & Traditional |
| Corten Steel Strips | $$$ (Moderate-High) | 30+ Years | Easy to Moderate | Modern, Contemporary, & Minimalist |
| Landscape Timbers | $$ (Moderate) | 10–15 Years | Easy | Farmhouse, Raised Beds, & Woodlands |
| Heavy Plastic/Rubber | $ (Budget) | 5–10 Years | Very Easy | Casual DIY & Rental Properties |
| Victorian Spade Trench | $ (Free DIY) | 1 Season (Renewable) | Easy Physical Labor | English Gardens & Naturalized Landscapes |
Proper preparation is the secret to borders that stay level year after year without sagging or sinking into mud during winter thaws. Here is how to install stone or paver edging like a pro.
Use a bright garden hose or heavy rope to lay out sweeping natural curves. For straight lines, stake both ends and stretch a tight painter's string line across the yard. Once satisfied with the layout, mark the border path using eco-friendly upside-down marking spray paint.
Dig a flat trench along your line roughly 2 to 3 inches wider than your chosen material. The depth of your trench should equal the height of your stone or brick, plus an extra 2 inches to accommodate a compacted sand and gravel base foundation.
Tamp down the bare dirt at the bottom of the trench until firm. Add a 1.5-inch layer of crushed paver base gravel, spray lightly with water, and compact it using a hand tamper. Follow with a 0.5-inch levelling layer of sharp builder's sand.
Set your stones or bricks onto the sand bed, tapping each firmly into place using a rubber mallet while checking levelness with a small torpedo spirit level. Backfill the lawn side with topsoil and pack mulch tightly against the garden bed side.
You do not need to spend thousands of dollars at a stone yard to build unique garden borders. Repurposing salvaged items adds whimsical charm and personal storytelling to your outdoor spaces.
Even the best installed garden borders require occasional routine care to remain crisp through changing seasons:
Browse through our collection of comprehensive plant profiles to find the perfect additions to your sunny landscape borders and native meadows.