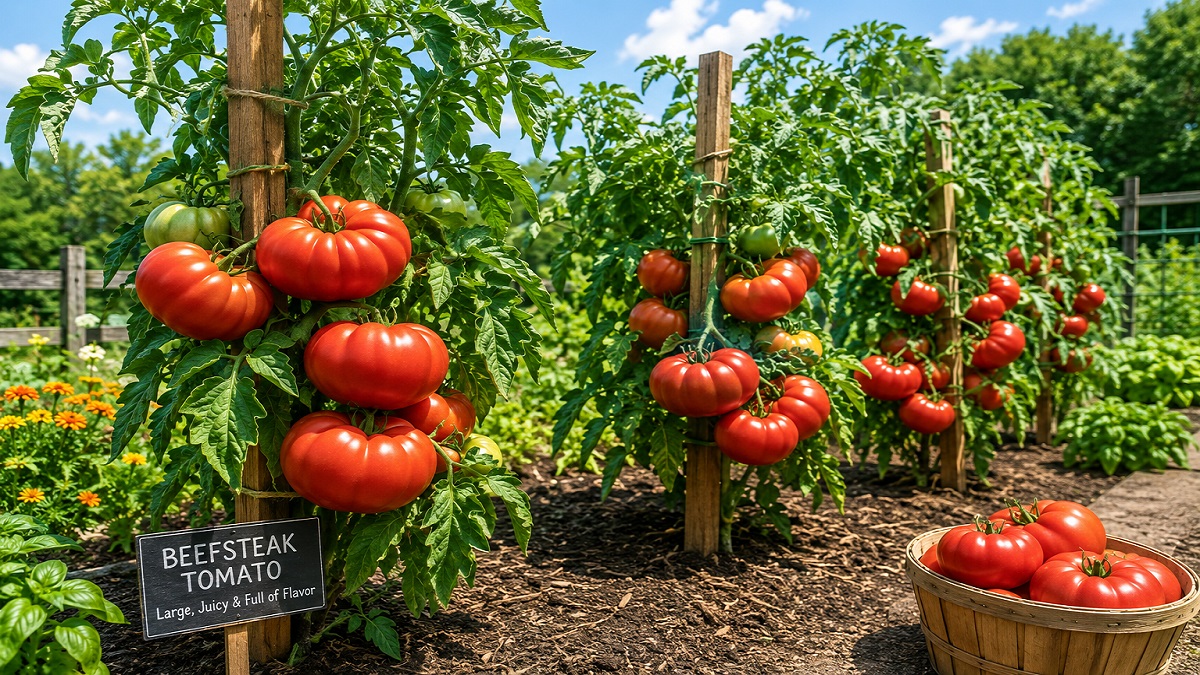
Healthy Beefsteak Tomato plants growing on sturdy supports with giant ripe fruits ready for harvest in a productive summer vegetable garden.
There is a defining moment in every vegetable gardener’s life: the afternoon you harvest your first true beefsteak tomato. It rests in your palm, surprisingly heavy, radiating the heat of the summer sun, its skin taut and glossy. Unlike the standard round globes or small cherry varieties found stacked in neat grocery store pyramids, a classic beefsteak is wonderfully irregular. It features ribbing, broad shoulders, and a meaty texture that easily turns a basic sandwich into a culinary experience. But if you have ever tried growing these beautiful giants, you know they are the high-maintenance divas of the summer garden.
Beefsteak tomatoes demand more of everything. They require more sun, more consistent watering, heavier structure for vertical support, and a lengthier, warm growing season than almost any other tomato type. A small mistake in care can lead to blossoms dropping off the plant, fruit splitting open over a rainy weekend, or the frustrating discovery of black, leathery patches on the bottom of your first ripening fruit. However, the path to a high-yielding, healthy beefsteak plant is straightforward when you understand exactly how the plant operates.
This master guide gathers decades of hands-on gardening experience to walk you through every stage of cultivating beefsteak tomatoes. We will cover selecting the right varieties for your region, building a resilient root system, training the massive vines, and safely bringing your harvest across the finish line.
Understanding the Anatomy and Nature of the Beefsteak
To grow a truly exceptional beefsteak, you have to understand what makes it tick. The term "beefsteak" refers to a classification of tomatoes known for their large size, multiple seed cavities (known as locules), and a high ratio of solid flesh to liquid jelly and seeds. This distinct structure gives them their characteristic dense, meaty texture, making them the ultimate slicing tomato.
Almost all beefsteak cultivars are indeterminate. In gardening terms, this means the plant behaves like a perennial vine, continuing to grow, branch out, and set blossoms until a hard frost kills it in the autumn. Conversely, determinate varieties grow to a fixed size, set their fruit all at once, and then die back. Because indeterminate vines keep growing, they require heavy-duty vertical support and regular pruning. Their long growing season means the journey from planting a tiny seed to slicing a one-pound fruit can span anywhere from 75 to 90 days after transplanting into the ground.
At A Glance: Core Needs
Sunlight: 8+ hours of direct sun daily.
Soil pH: 6.2 to 6.8 (Slightly acidic).
Spacing: 24 to 36 inches apart.
Water: 1 to 2 inches per week, delivered deeply at the base.
Support: Heavy-duty cages, stakes, or overhead trellises.
Top Varieties Worth Growing
Choosing the right variety depends on your local climate window and your personal flavor profile preference. Heirloom varieties are prized for their complex, rich balance of sugars and organic acids, whereas modern hybrid selections offer valuable genetic protection against common regional soil-borne pathogens.
Variety Name
Type
Days to Maturity
Flavor & Characteristics
Brandywine (Pink)
Heirloom
85 - 90 days
Legendary sweet-tart balance; potato-leaf foliage; slow to mature but unmatched in taste.
Cherokee Purple
Heirloom
75 - 80 days
Deep dusky-purple skin; smoky, sweet, rich interior; highly reliable in warm zones.
Pink-red giants often exceeding 2 lbs; exceptionally mild, sweet flesh with very low acidity.
Black Krim
Heirloom
75 - 80 days
Dark maroon shoulders; deeply rich, salty-sweet complex profile; thrives well in intense summer heat.
Preparing the Ultimate Planting Site
A giant beefsteak tomato plant cannot survive on a starvation diet or in compacted soil. The extensive root system of an indeterminate tomato vine can easily reach up to three feet deep and spread just as wide when given the proper soil structure. Therefore, preparing the planting bed is the most important physical work you will do all season.
First, evaluate the light. Tomatoes need a minimum of six hours of direct sunlight daily to produce fruit, but for large-fruited beefsteaks, eight to ten hours is the sweet spot. Without adequate light, the plants grow tall and spindly, focusing energy on stretching toward the sun rather than developing blossoms and heavy fruit.
Soil Modification and Nutrient Balancing
Tomatoes thrive in loose, well-draining, loamy soil rich in organic matter. If you have heavy clay that bakes like brick in summer, or pure sand that lets water slip through instantly, you must amend it generously. Mix a three- to four-inch layer of high-quality compost or aged animal manure into the top eight inches of your soil. This addition improves clay drainage, increases sandy soil water retention, and feeds beneficial soil microbes.
When it comes to nutrition, many gardeners mistakenly over-fertilize with nitrogen early on. High nitrogen levels stimulate lush, beautiful, deep green leaves, but result in few blossoms and zero fruit. Instead, focus on phosphorus and potassium for strong roots and blossom development, along with a crucial secondary nutrient: calcium.
Nutrient
Role in Beefsteak Development
Organic Delivery Sources
Nitrogen (N)
Drives early vine growth and leafy canopy development.
Blood meal, fish emulsion, alfalfa meal
Phosphorus (P)
Stimulates early root growth and abundant blossom production.
Bone meal, rock phosphate
Potassium (K)
Improves overall disease resistance, fruit quality, and water regulation.
Kelp meal, greensand, wood ash (sparingly)
Calcium (Ca)
Builds strong plant cell walls; prevents blossom end rot.
Growing from seed gives you access to hundreds of rare heirloom varieties that commercial nurseries never stock. To start from seed, sow your choices indoors roughly six to eight weeks before your region's historical average last spring frost date. Use high-quality, sterile seed-starting mix, plant the seeds a shallow quarter-inch deep, and maintain an ambient soil temperature around 70 to 75 degrees Fahrenheit using a dedicated seedling heat mat.
Once the tiny green sprouts emerge, provide strong light instantly. Standard window light is rarely intense enough and results in weak, leggy seedlings. Use adjustable shop lights or dedicated T5 fluorescent/LED grow lamps kept positioned just two to three inches directly above the topmost leaves. Keep the bulbs on for 14 to 16 hours daily.
If you prefer buying started seedlings from a greenhouse, be highly selective. Look for stocky, dark-green specimens with stems as thick as a standard pencil. Avoid buying tall, leggy, overgrown plants, and absolutely pass on plants that are already producing tiny yellow flowers or small green fruits. While those precocious fruits look exciting, the plant is actually rootbound and stressed; it will stall significantly upon transplanting compared to a younger, purely vegetative seedling.
The Art of the Deep Planting Technique
When the soil warms up in late spring and danger of frost has passed, it is time to plant your transplants. Tomato plants possess a unique, helpful characteristic: they can grow adventitious roots all along their stems. If you bury a tomato stem in the ground, every tiny, fuzzy hair along that stalk will transform into a root. A larger root system means the plant can absorb water and nutrients far more efficiently during hot summer spells.
Before placing your plant in the ground, pinch off the lower sets of leaves, leaving only the top two or three clusters of healthy foliage. Dig a deep hole or a shallow trench, lay the elongated stem down horizontally or stand it up deeply, and bury the stem right up to that remaining top tuft of leaves. Firm the soil gently around the base to eliminate large air pockets, and water the area thoroughly with a weak solution of liquid seaweed extract to ease transplant shock.
Pro-Tip: The Trench Planting Method for Leggy Starts
If your indoor seed-starting setup left you with tall, spindly, "leggy" transplants, do not worry. Dig a horizontal trench about four inches deep instead of a deep vertical hole. Lay the long stem down in the trench, gently curving the top cluster of leaves upward so it stands above the soil line. Fill the trench with soil. The buried stem will grow a massive network of roots right near the warm surface of the soil, giving your leggy plant a fantastic head start.
Water Management: Preventing Cracks and Rot
Inconsistent watering is the primary cause of beefsteak tomato failures. To understand why, look at how the fruit develops. When a beefsteak tomato is growing, its skin expands along with the internal flesh. If the soil dries out completely, the skin loses elasticity and hardens. If you then apply a massive amount of water all at once, the roots drink greedily, pumping moisture into the fruit. The inner flesh expands rapidly, but the hardened skin cannot stretch fast enough, causing the fruit to split open. These open wounds invite pests and mold, often ruining the tomato right before it ripens.
The Mechanics of Deep Watering
Instead of giving your plants a quick, shallow splash every afternoon, water them deeply two or three times a week. Run a soaker hose or drip irrigation system for a longer duration, ensuring moisture penetrates at least eight inches deep into the soil profile. Check the soil moisture by pushing your index finger down into the earth; if the top two inches feel dry, it is time to water.
Always apply water directly to the soil at the base of the plant, keeping the leaves completely dry. Overhead watering wets the thick canopy of leaves, creating a humid environment where fungal spores like early blight can quickly take hold and spread.
The Indispensable Value of Mulch
Immediately after planting and setting up your watering system, lay down a thick, three-inch layer of organic mulch around the base of your plants. Clean straw, shredded autumn leaves, or untreated wood shavings work beautifully. Mulch serves three critical functions: it keeps soil moisture uniform by slowing evaporation, keeps roots cool during intense summer heat waves, and acts as a physical barrier. This barrier prevents soil-borne fungal spores from splashing up onto the lower leaves during heavy rainstorms.
Pruning and Training Indeterminate Giants
Left to their own devices, indeterminate beefsteak vines turn into a chaotic, tangled jungle of green growth. This dense foliage blocks out sunlight, reduces air circulation, and forces the plant to spend its limited energy maintaining leaves rather than ripening giant tomatoes. Proper pruning is essential for success.
Identifying and Removing Suckers
Look closely at your tomato plant where a main vertical stem meets a horizontal leaf branch. In that V-shaped junction, you will spot a tiny new green shoot emerging. This shoot is called a sucker. If left alone, every sucker will grow into a full-sized, heavy side stem with its own blossoms, leaves, and fruit. While that sounds like a good thing, a beefsteak plant trying to support fifteen different stems will produce dozens of tiny, low-quality tomatoes and collapse under its own weight.
For beefsteaks, it is best to train the plant to either a single main stem or two strong stems. Once a week, walk through your garden and snap off these small suckers using your thumb and forefinger when they are under two inches long. If a sucker grows too large, cut it off cleanly with sharp, sanitized pruning shears to avoid tearing the main stalk's delicate skin.
Managing the Canopy and Air Circulation
As the plant grows taller, continuously prune away the lower leaves within twelve to eighteen inches of the ground. These old, lower leaves receive very little sunlight because of the canopy above, and they are the first to contract soil-borne fungal diseases. Removing them creates a clean, open space at the base of the vine, maximizing airflow and keeping the entire plant significantly healthier.
Heavy-Duty Support Systems
A single, mature beefsteak tomato plant can weigh upwards of twenty to thirty pounds when loaded with ripening fruit. The cheap, cone-shaped wire cages sold at local hardware stores will quickly buckle and tip over under this weight. You need a robust structural support plan in place on day one.
The Three Best Support Methods
Heavy T-Posts and Staking: Drive an eight-foot metal T-post at least two feet into the ground next to each plant. As the main stem grows upward, secure it to the post every twelve inches using soft twine, old t-shirt strips, or specialized plant clips. Tie the twine loosely in a figure-eight pattern to give the stem room to thicken throughout the summer.
The Florida Weave: Ideal if you are growing a long row of plants. Drive heavy wooden or metal stakes at the ends of the row and between every two plants. Weave strong garden twine horizontally back and forth between the stakes, sandwiching the growing tomato vines securely between the tight strings. Add a new row of twine every eight inches as the plants grow taller.
Heavy-Duty Custom Cattle Panel Cages: You can construct your own indestructible cages using galvanized steel cattle panels. Roll the stiff mesh panels into sturdy cylinders about two feet in diameter and secure them to the ground with rebar stakes. The large four-by-four-inch openings allow you to easily reach through and harvest giant tomatoes without damaging the vine.
Navigating Common Pests and Diseases
Even with perfect soil and consistent watering, challenges will come. Knowing how to identify threats early allows you to step in before a problem ruins your entire harvest.
Fungal Blights
Early Blight shows up as small, dark spots with concentric rings (like a target) on the oldest, lowest leaves first. Late Blight is a more destructive, fast-moving disease that appears during cool, wet spells, creating large, water-soaked dark patches across leaves and stems. To combat these, prune away affected leaves immediately, maintain a thick layer of protective mulch, and apply an organic copper-based fungicide proactively if your region experiences prolonged, warm rainy periods.
Pest Management
Keep a sharp eye out for the infamous Tomato Hornworm. These massive, bright green caterpillars feature a small horn on their rear and camouflage perfectly along the stems. They can strip an entire mature plant of its leaves overnight. Check your plants daily; look for missing leaves and clusters of dark green droppings on lower branches. Hand-pick the hornworms off the vine and drop them into a bucket of soapy water. If you notice a hornworm covered in tiny, white, oval cocoons, leave it alone! Those cocoons belong to beneficial parasitic braconid wasps, which act as nature's natural pest control system.
Harvesting and Storage Tips
Knowing exactly when to pluck your hard-earned beefsteaks is crucial. While leaving them to ripen completely on the vine sounds ideal, it increases the risk of bird damage, insect boring, and fruit cracking. Instead, harvest your tomatoes at the breaker stage—the precise moment the skin shifts from solid pale green to its first blush of pink or orange (roughly 30% to 50% color change).
Once a tomato reaches the breaker stage, it has sealed its internal connection stem and fully accumulated all its sugars and acids. Bringing it indoors to finish ripening on a kitchen counter out of direct sunlight yields an identical flavor profile while protecting the perfect fruit from outdoor destruction.
The Golden Rule of Tomato Storage
Never place fresh, homegrown tomatoes in the refrigerator! Cold temperatures below 50°F (10°C) permanently damage the volatile flavor compounds and break down the delicate cell walls, turning a beautifully meaty beefsteak into a bland, mealy disappointment. Keep your harvest at room temperature on the kitchen counter, and enjoy within a few days.
Frequently Asked Questions
Why are the blossoms falling off my beefsteak tomato plants without setting fruit?
This frustrating issue is called "blossom drop." It is typically caused by extreme temperatures. If daytime temperatures soar above 90°F (32°C) or nighttime temperatures stay above 75°F (24°C) or drop below 55°F (13°C), the tomato's pollen becomes sticky or sterile, preventing pollination. Keep the plants well-watered and apply a temporary shade cloth during severe heatwaves to help them pull through.
What causes the bottom of my tomatoes to turn black and leathery?
This is classic Blossom End Rot. It is caused by a lack of calcium in the fruit's cells during development. However, this is rarely due to a lack of calcium in the soil. Instead, it is usually caused by inconsistent watering; if the soil dries out, the roots cannot draw up calcium to deliver it to the fruit. Consistent deep watering and a steady layer of mulch will fix the problem.
Can I grow large beefsteak varieties successfully in containers or pots?
Yes, but you need a very large container. Because indeterminate beefsteaks grow massive roots and vines, use a pot that holds at least 15 to 20 gallons (like a half wine barrel). Ensure it has excellent drainage holes, use a high-quality potting mix, and be prepared to water daily during the peak of summer, as containers dry out much faster than garden beds.
How do I know if my heirloom tomato is ripe if it stays green on top?
Many heirloom beefsteaks (like Cherokee Purple or Brandywine) naturally retain green coloration around their shoulders even when fully ripe. Do not wait for the green shoulders to disappear. Instead, judge ripeness by gently squeezing the base of the fruit; it should feel slightly soft, and the color on the bottom two-thirds should be rich and vibrant.