Growing & Caring for Bearded Iris (Iris germanica)
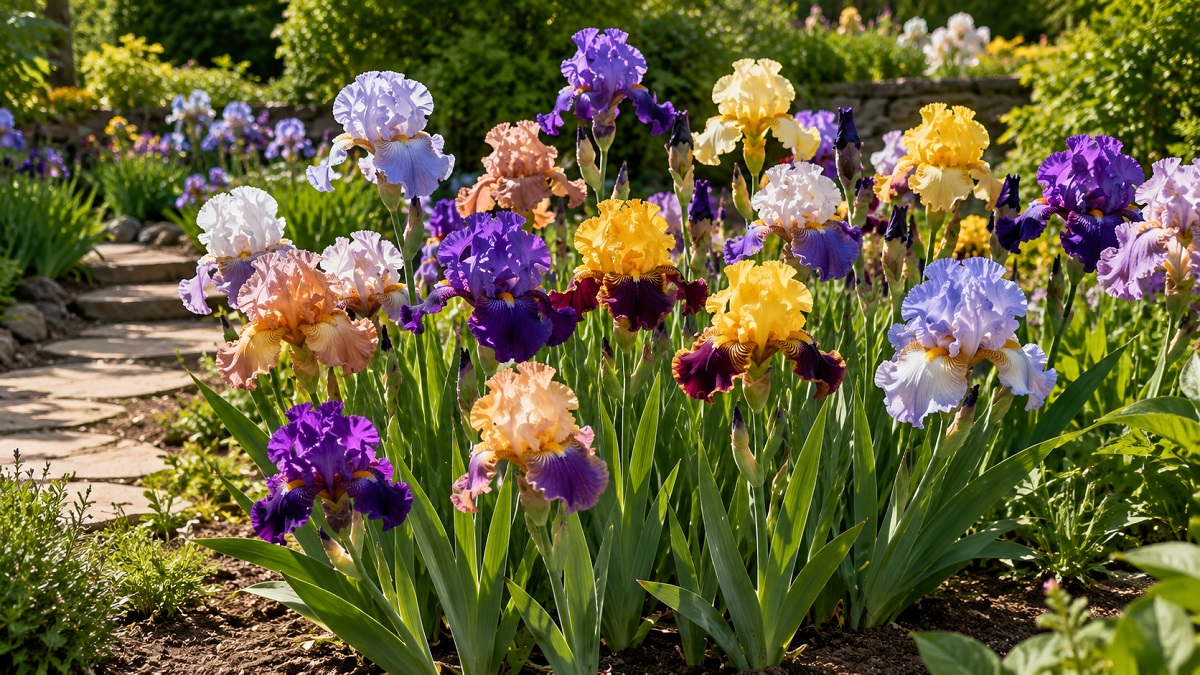
Bearded irises (Iris germanica) stand as the undisputed royalty of the spring perennial border. Renowned for their architectural sword-like foliage and complex, structurally dynamic blossoms, these resilient perennials have captured the hearts of gardeners for generations. Characterized by the prominent fuzzy "beard" located at the base of their lower petals, bearded irises boast an astonishing spectrum of color combinations, ranging from pure snow white to deepest velvety near-black, alongside dazzling bi-colors and iridescent, multi-tonal blends. Fortunately, achieving show-stopping iris displays does not require a degree in botany. By mastering their fundamental environmental preferences, understanding their lifecycle, and adhering to simple seasonal upkeep, you can enjoy these breathtaking blooms year after year.
Understanding Iris Anatomy and Classifications
To successfully care for bearded irises, one must understand their unique anatomy. The flower structure comprises three upward-facing petals known as standards, and three downward-cascading petals called falls. Running down the center of each fall is the fuzzy beard, designed by nature to guide pollinators toward the reproductive organs. Beneath the surface lies the most critical structure: the rhizome. The rhizome is a thick, horizontally growing underground stem that stores carbohydrates and essential nutrients, acting as the life support system for the plant's fan of leaves.
Bearded irises are structured into specific categories based predominantly on their mature height and blooming windows. Choosing varieties from across these classifications is an excellent technique to stretch your spring blooming season from early April through late June.
| Classification | Height Range | Typical Bloom Season | Best Landscape Use |
|---|---|---|---|
| Miniature Dwarf Bearded (MDB) | up to 8 inches | Very Early Spring | Rock gardens, pathways, alpine troughs |
| Standard Dwarf Bearded (SDB) | 8 to 15 inches | Early Spring | Border edgings, small container accents |
| Intermediate Bearded (IB) | 16 to 27 inches | Mid-Spring | Mass plantings, mixed perennial borders |
| Border Bearded (BB) | 16 to 27 inches | Late Spring | Mid-border focal points, cut flowers |
| Miniature Tall Bearded (MTB) | 16 to 25 inches | Late Spring | Dainty cut floral arrangements, cottage gardens |
| Tall Bearded (TB) | 28 inches and above | Late Spring to Early Summer | Dramatic backdrops, architectural statements |
Optimal Site Selection and Soil Preparation
The golden rule of bearded iris cultivation is absolute clarity regarding their environmental non-negotiables: maximum sunlight and impeccable drainage. Select a location in your landscape that receives a minimum of 6 to 8 hours of unfiltered, direct sunlight per day. Insufficient sunlight will result in a profound reduction in blooms, weaker stalks, and increased susceptibility to fungal diseases. If you plant them in partial shade, you may achieve lush green foliage, but the structural flower yields will disappoint.
Equally critical is the condition of the soil. Bearded irises will rot quickly if left in heavy, waterlogged, or clay-heavy soils. The ideal substrate is a fertile, loose, sandy or loamy soil with a neutral to slightly acidic pH range of 6.0 to 7.0. If your garden is burdened with heavy clay, do not despair. You can amend the planting area by incorporating substantial amounts of decomposed organic matter, coarse grit, or fine pea gravel. Alternatively, constructing raised garden beds provides an efficient way to control drainage conditions perfectly.
- Dig a Shallow Trench: Dig a hole roughly 10 inches wide and 4 inches deep. Build a firm mound of loose soil directly in the center of the excavated hole.
- Position the Rhizome: Place the rhizome horizontally on top of the central mound. Spread the long roots out carefully down both sides of the mound.
- Expose the Top: Backfill the hole with loose soil, ensuring the top surface of the horizontal rhizome remains partially exposed to the air and sun. Do not bury it deeply.
- Spacing: Space rhizomes 12 to 24 inches apart, pointing the leafy fans in the direction you wish the plant to expand.
- Water In thoroughly: Water deeply immediately upon planting to settle the surrounding soil around the roots.
Newly planted iris rhizomes require consistent, weekly moisture for the first month to establish an anchor root system. However, once established, bearded irises are highly drought-tolerant. Overwatering is a common mistake that causes root rot. Water deeply only when the top two inches of soil dry out completely.
When it comes to feeding your irises, less is more. Avoid high-nitrogen fertilizers at all costs; excessive nitrogen promotes rapid, soft foliage growth that is weak against winter frost and highly vulnerable to soft rot. Instead, apply a low-nitrogen, high-phosphorus granular fertilizer (such as a 5-10-10 or 6-10-10 blend) early in the spring, approximately one month before blooming. Repeat this application once more in the early autumn to stimulate root growth for the next year.
Routine Maintenance, Division, and Propagation
To keep your bearded iris beds thriving for years, establish a solid maintenance schedule. In the spring, remove dead leaves and winter debris from around the rhizomes to prevent pests. As the blooming season progresses, practice active deadheading. Snap off spent flowers at the base of the bloom to prevent seed pod formation, which drains vital energy from the rhizome. Once the entire flower stalk finishes blooming, cut it down close to the base using sharp, sanitized pruning shears.
As the years pass, a healthy iris clump will multiply. Over time, the center of the clump can become overcrowded, causing the rhizomes to compete for space and nutrients. When this occurs (typically every 3 to 5 years), you will notice a significant decline in bloom production. The solution is dividing the rhizomes, which should ideally be done in late summer, about 4 to 6 weeks after blooming concludes.
Step-by-Step Division Technique:
Carefully lift the entire overgrown clump using a garden fork, taking care not to puncture the rhizomes. Shake off the excess soil to expose the roots. Use a sharp, sterile knife to cut the rhizomes into clean sections. Each new division must possess at least one healthy fan of leaves, a firm segment of rhizome, and several white anchor roots. Discard the old, hollow, withered center sections of the original clump.
Before replanting your new divisions, trim the fan of leaves down to a clean, inverted "V" shape about 6 inches tall. Trimming reduces water loss while the plant establishes new roots, and prevents strong autumn winds from rocking the newly anchored rhizome out of place.
Pest and Disease Troubleshooting Matrix
While bearded irises are remarkably tough, they are susceptible to a few specific pests and diseases. The most notorious threat is the Iris Borer (Macronoctua onusta). In early spring, the tiny larvae hatch from eggs laid on old foliage, chew their way into the leaves, and tunnel down into the rhizome. Their feeding creates entry points for bacterial pathogens, leading to the devastating Bacterial Soft Rot (Pectobacterium carotovorum), which turns the firm rhizome into a foul-smelling, mushy paste.
Another common issue is Fungal Leaf Spot (Heterosporium iridis), which presents as small, brown, oval spots with yellow halos across the leaves. While rarely fatal, leaf spot weakens the plant and looks unsightly. Prevent this by maintaining excellent spacing for airflow and removing infected foliage promptly.
| Symptom | Probable Cause | Immediate Remedial Action |
|---|---|---|
| Water-soaked streaks on leaves, leading to slimy, foul-smelling rhizomes. | Bacterial Soft Rot | Dig up infected rhizomes. Cut away mushy tissue completely. Dip remaining firm sections in a 10% bleach solution, let dry in the sun, and replant in clean soil. |
| Tiny pinholes in spring leaves, evolving into hollow, chewed-out rhizome interiors. | Iris Borer Larvae | Apply beneficial nematodes to the surrounding soil in early spring. Remove and destroy all dead leaf debris in late autumn to eliminate overwintering eggs. |
| Tan, oval spots with dark reddish-brown borders appearing on leaf surfaces. | Fungal Leaf Spot | Trim away infected leaf tips immediately. Avoid overhead watering. Apply a copper-based fungicide spray early in the spring season as a preventative measure. |
| Lush, dark green leaf growth with absolutely no flower stalks forming. | Excess Nitrogen / Deep Planting | Stop using high-nitrogen fertilizers. Check the planting depth; if the rhizomes have become buried under soil or mulch, gently scrape it away to expose the top. |