Cutworms in the Garden: Identification, Damage & Organic Control
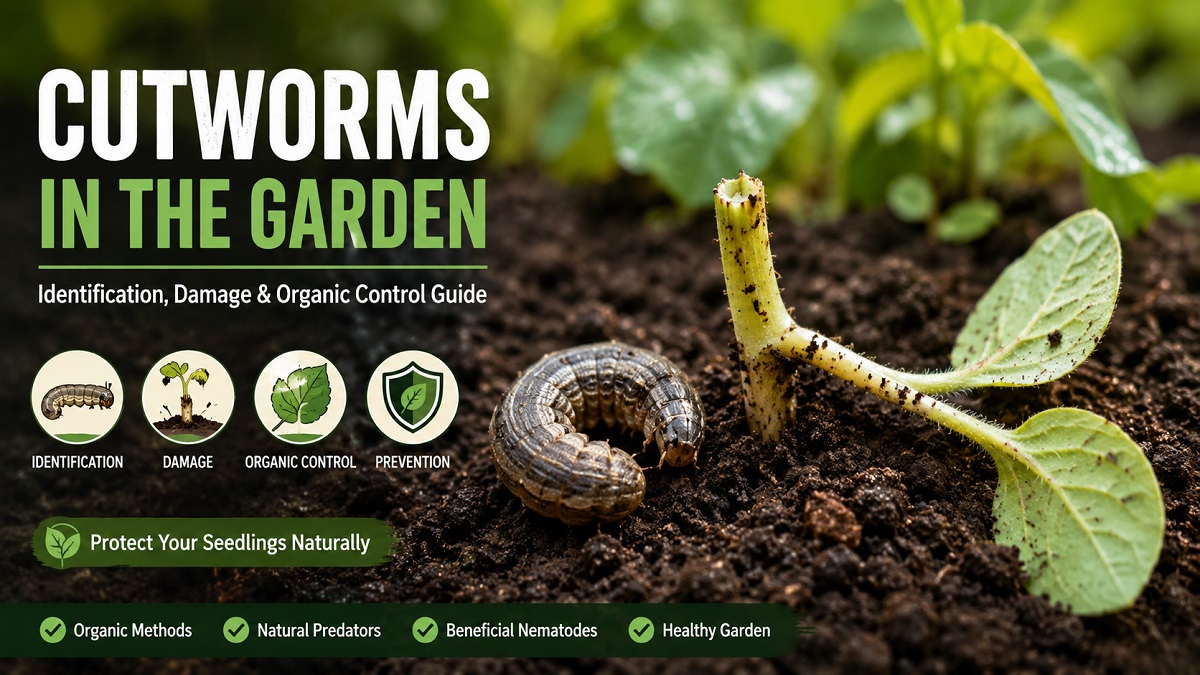
It is a heartbreaking scene familiar to almost every backyard grower. You spend weeks nurturing tender heirloom tomato seeds on your windowsill, carefully potting them up, hardening them off, and finally tucking them into your freshly prepared spring garden beds. You go to bed dreaming of summer harvests. But the next morning, you step out with your coffee only to find your prized seedlings chopped cleanly off at soil level, lying on the dirt like tiny felled timber.
There is no chewing on the upper leaves, no trail of slime, and no visible culprit in sight. It looks as though a miniature vandal snuck in under the cover of darkness with a tiny pair of scissors.
You have just been visited by the cutworm. This nocturnal underground pest is one of the most frustrating challenges a gardener can face, but it is far from unbeatable. With a solid understanding of their biology, behaviors, and vulnerabilities, you can easily protect your crops using entirely natural and organic strategies. Let's dig deep into how we can safeguard your garden from these stealthy invaders.
Meet the Cutworm: Biology and Behavior
Despite their name, cutworms are not actually worms. They are the larval (caterpillar) stage of several species of nocturnal moths belonging to the family Noctuidae. While the adult moths are drab, harmless creatures that feed on nectar and flutter around outdoor lights in the summer, their subterranean offspring are voracious eaters with a destructive appetite for tender young plant tissue.
Understanding their physical characteristics is the first step in identifying them before they decimate your hard work:
- Appearance: Cutworms are plump, soft-bodied, and smooth, lacking the distinct hairs or spines found on many other garden caterpillars. They typically grow to about 1 to 2 inches (2.5 to 5 cm) in length when fully mature.
- Coloration: Their colors are drab and designed to blend seamlessly into soil and mulch. Depending on the specific species, they can range from dull gray, brown, and tan to nearly black or dingy green. Some feature subtle stripes, spots, or greasy-looking skins.
- The Defense Curl: If you uncover a cutworm while weeding or digging, its immediate defense mechanism is to curl tightly into a neat, compact "C" shape and play dead. If it curls up like a tiny gray crescent, you have found your culprit.
- Night Owls: Cutworms are strictly nocturnal. They hide beneath clods of dirt, mulch, or in the upper few inches of the soil during the bright, dry daylight hours. Once darkness falls, they emerge from the ground to feed safely away from predators.
The Common Cutworm Rogues' Gallery
While there are dozens of species of Noctuidae moths, a few specific culprits are responsible for the vast majority of agricultural and home garden damage. Knowing which species you are dealing with can help you pinpoint where they are hiding and how they like to feed.
1. The Black Cutworm (Agrotis ipsilon)
This is perhaps the most notorious member of the family. The larvae are dark gray to nearly black with a distinctively greasy or shiny skin texture. They are notorious surface-cutters, preferring to sever young plants right at the soil line. They thrive in damp conditions and are common in early spring.
2. The Variegated Cutworm (Peridroma saucia)
Variegated cutworms are unique because they are avid climbers. Instead of remaining on the ground, they will climb up the stems of taller plants, shrubs, and even low-hanging fruit trees to feed on foliage, flowers, and buds. They are brownish-gray with a row of distinct, pale yellow-to-orange spots running down the center of their backs.
3. The Dingy Cutworm (Feltia jaculifera)
Dingy cutworms are dull gray-brown with a broad, pale stripe down their back that features faint V-shaped markings. Unlike some other species that migrate into gardens in late spring, dingy cutworms often overwinter in the soil as partially grown larvae, meaning they are active and hungry the very moment you plant your earliest spring crops.
4. The Army Cutworm (Euxoa auxiliaris)
These cutworms are known for their occasional "marching" behavior. When populations are extremely high and food sources run low, they will move en masse across lawns and gardens in search of fresh green plants, eating almost everything in their path.
How to Diagnose Cutworm Damage
Because cutworms do their dirty work in the dead of night, you will rarely catch them in the act without a flashlight. Instead, you must learn to read the crime scene they leave behind. If you notice any of the following symptoms, it is time to take immediate action:
- Severed Stems: The classic "signature" of a cutworm. Seedlings are cut completely through at or slightly below the soil surface. The severed top of the plant is often left lying right next to the remaining stump.
- Girdled Stems: Sometimes, a cutworm will chew a deep, circular ring around the base of a slightly thicker, tougher stem instead of cutting it entirely. This girdling cuts off the plant's nutrient flow, causing it to wilt and die within days.
- Disappearing Seedlings: Very small seedlings may vanish entirely overnight, dragged down into the soil burrow of a hungry larva.
- Chewed Foliage and Holes: Climbing species like the variegated cutworm will leave irregular holes in leaves, strip lower branches, or damage tender, developing fruit like low-hanging tomatoes and peppers.
Is it Damping-Off or Cutworms?
New gardeners sometimes confuse cutworm damage with "damping-off," a common fungal disease that attacks young seedlings. However, the difference is easy to spot once you know what to look for.
Damping-off causes the stem of the seedling to shrivel, pinch, and soften into a dark, mushy, thread-like pinch right at the soil level, causing the plant to collapse. A cutworm, on the other hand, leaves a clean, sharp, physical cut through a perfectly healthy stem, leaving the fallen plant firm and intact.
The Seasonal Life Cycle of the Cutworm
To successfully disrupt the cutworm lifecycle, we have to understand how they spend their year. This allows us to strike when they are at their most vulnerable.
The lifecycle consists of four distinct stages: Egg, Larva (the destructive phase), Pupa, and Adult (moth).
In late summer and early autumn, female moths lay hundreds of tiny, white eggs on garden debris, weeds, and low-lying vegetation. Depending on the species and the climate, these eggs may hatch within days, or they may remain dormant through the winter.
The species that hatch in autumn spend the winter as partially grown larvae, burrowed deep below the frost line in the soil or nestled under thick layers of leaf litter. As soon as the soil begins to warm up in early spring, these hungry, overwintered larvae rise to the surface, looking for any green shoot they can find. This is why early spring plantings are at such high risk.
Once the larvae have gorged themselves for several weeks and reached their full size, they burrow back down into the soil to build a small, earthen chamber. Here, they transform into smooth, dark brown pupae. After a few weeks of metamorphosis, the adult moths emerge in mid-to-late summer to mate, fly, and begin the cycle all over again.
Physical Barriers: Your First Line of Defense
Because cutworms generally feed by wrapping their bodies around a stem at the soil line, physical barriers are incredibly effective. They prevent the caterpillar from ever making physical contact with the stem. Best of all, these methods are cheap, simple, and 100% organic.
1. The Cardboard Collar Trick
This is the gold standard of organic cutworm protection. You can repurpose toilet paper rolls, paper towel tubes, or small paper cups.
Cut the cardboard tubes into 3-inch (7.5 cm) segments. When transplanting your seedlings, slip a tube over each plant, pushing it at least 1 to 1.5 inches deep into the soil, leaving the remaining portion sticking straight up out of the ground. This creates an impenetrable physical wall. By the time the plant grew large enough to break or degrade the cardboard, its stem will be too woody and thick for a cutworm to chew through.
2. Aluminum Foil Wraps
If you do not have cardboard tubes, a small strip of aluminum foil works beautifully. Tear off a small square of foil and gently wrap it around the lower stem of your transplant, ensuring that it covers the stem from about an inch below the soil line to two inches above it. The foil is too slick and tough for the cutworm's mouthparts to penetrate.
3. The Toothpick or Nail Method
If you are planting in large quantities and collars are too labor-intensive, you can exploit the cutworm's feeding posture using simple sticks. Cutworms must wrap their bodies completely around a stem to cut it.
Insert a sturdy toothpick, a small wooden matchstick, or a small twig directly against the stem of your transplant, pushing it an inch into the soil. The rigid stick prevents the cutworm from looping its body around the stem, rendering it unable to apply the leverage needed to chew through the plant.
Active Organic Control & Treatments
If cutworms have already breached your perimeter, physical barriers alone might not be enough. You will need to actively reduce their population. Here are the most effective, safe, and ecologically friendly treatments for your backyard.
1. Flashlight Patrols (Handpicking)
It might sound tedious, but handpicking is incredibly effective for small-scale home gardens. Grab a flashlight, put on some garden gloves, and head out to your beds about an hour or two after total darkness.
Inspect the base of your seedlings carefully. You will often find the caterpillars fully exposed, clinging to the stems of your plants or crawling over the mulch. Simply pluck them off and drop them into a bucket of soapy water to drown.
Pro Tip: If you find a freshly severed plant during the day, don't just mourn and walk away. Gently scratch the soil in a 3-inch radius around the base of the damaged plant, about 1 to 2 inches deep. Because cutworms do not travel far during the day, you will almost always find the culprit sleeping right next to its latest meal.
2. Diatomaceous Earth (DE)
Diatomaceous earth is a natural powder made from the fossilized remains of microscopic aquatic organisms called diatoms. To human hands, it feels like soft flour. But to a soft-bodied insect, it is incredibly sharp.
Dust a generous ring of food-grade diatomaceous earth around the base of your plants. When a cutworm tries to crawl over the barrier, the sharp microscopic edges slice through its protective waxy outer coating, causing it to dehydrate and die. Keep in mind that DE loses its effectiveness when wet, so you must reapply it after rain, heavy dew, or overhead watering.
3. Beneficial Nematodes
For a highly effective, set-it-and-forget-it biological solution, turn to beneficial microscopic roundworms known as nematodes (specifically the species Steinernema carpocapsae).
These microscopic organisms are watered directly into the soil. Once active, they actively hunt down and parasitize cutworms, grubs, and other soil-dwelling pests, releasing a symbiotic bacteria that kills the host within 24 to 48 hours. They are completely harmless to humans, pets, plants, and earthworms.
4. Bacillus thuringiensis (Bt)
Bacillus thuringiensis (commonly known as Bt) is a naturally occurring soil bacterium that acts as a highly specific stomach poison for caterpillars. When a cutworm ingests plant tissue treated with Bt, the bacterial proteins paralyze its digestive system, causing it to stop feeding immediately and die within a few days.
Because Bt is only toxic to insects in the caterpillar family that actively consume the treated plant material, it is highly targeted and will not harm bees, ladybugs, or birds. Spray it on the lower stems of your plants in the late afternoon so it does not break down in the midday sun before the cutworms emerge to feed.
Comparing Organic Cutworm Control Methods
To help you decide which approach is best for your gardening style and budget, use this quick-reference table to compare your options:
| Method | Primary Action | Best For | Pros | Cons |
|---|---|---|---|---|
| Cardboard Collars | Physical Barrier | New Transplants | Low cost, 100% effective when done right | Time-consuming for large gardens |
| Handpicking (Night Patrol) | Manual Removal | Small Gardens | Free, highly targeted, instant results | Requires nocturnal gardening |
| Diatomaceous Earth | Mechanical Desiccation | Dry Climates / Raised Beds | Easy to apply, inexpensive | Must be reapplied after rain |
| Beneficial Nematodes | Biological Parasitism | Large Plots / Severe Infestations | Long-term control, targets underground larvae | Requires moist soil and cool application temps |
| Bt (Bacillus thuringiensis) | Targeted Stomach Poison | Climbing Cutworms / Foliage Protection | Organic, safe for non-caterpillar wildlife | Degrades quickly in bright sunlight |
Cultural Controls: Designing a Cutworm-Resistant Garden
Prevention is always easier than cure. By modifying your gardening habits and design, you can make your yard highly unattractive to adult moths looking for a place to deposit their eggs.
- Delay Your Spring Planting: If you can afford to wait, delaying your outdoor transplanting by just a couple of weeks can make a massive difference. Cutworms are most active and destructive in the very early spring when they first emerge from winter dormancy. By late spring, many have already begun to pupate, meaning the threat level drops significantly.
- Keep a Clean Garden Border: Adult moths love to lay their eggs in thick, overgrown grassy areas and weedy patches. By keeping a 3-to-4-foot buffer strip of bare, cultivated soil or clean mulch around your vegetable beds, you create a "no-man's-land" that tiny, newly hatched larvae will struggle to cross.
- Fall and Spring Tilling: While "no-dig" gardening has many benefits, if you have a severe cutworm infestation, light cultivation of the top 2 inches of soil in late autumn and early spring can expose hibernating larvae and pupae to freezing temperatures and hungry birds.
- Manage Your Cover Crops Wisely: Cover crops are amazing for soil health, but turning them under right before planting can create a cutworm buffet. If you grow winter cover crops, turn them under at least 2 to 3 weeks before planting your vegetables to starve out any resident cutworm larvae before your crops arrive.